Author: admin

“EDC” Tool Kit

I thought for this month’s blog post, I would break down the tools I keep in my desk drawer at my main work space at home.  My desk tool drawer has a small pouch with a basic set of tools (broken down below), a fluke 87v multi-meter, x-acto knife, calipers, micrometer, imperial/metric set of sockets, and a small battery powered screwdriver.  My main tool box and tools are in the basement, two flights of stairs down and then back up.  95% of the time, I can deal with a problem, or get better eyes on it, by having these tools at hand.
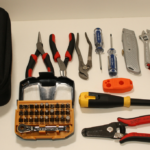
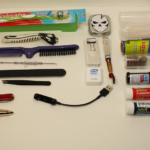
Breakdown, from left to right:

  1. Mini Needle Nose Pliers
  2. Mini side cutters
  3. Pump pliers
  4. #0 Phillips
  5. 1/8″ Flat head
  6. Utility Knife
  7. Crescent Wrench
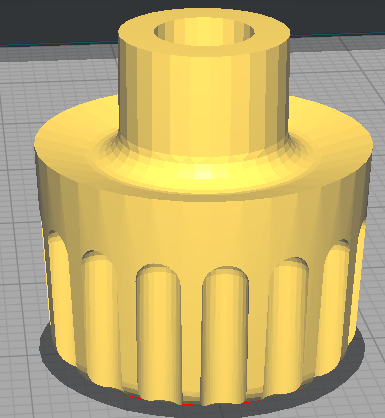
  8. Custom 3d printed bit organizer, with 5/32 Hex end, T20, T10, #1 Philips, 3/16″ & 1/4″ flat head bits.
  9. Bit insert & ratcheting handle set. I bought this originally as a bostisch but now Stanley is selling them. The Wiha 74996 is a good alternative as well.
  10. Klein Mag2 tool magnetizer & demagnitizer.
  11. Stanley 68-107 screwdriver
  12. Hakko Wire Strippers
  13. Tape Measure I got from a trade show long ago. Standard\metric.


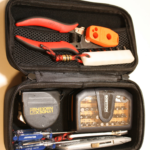
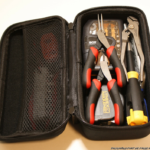
And packed down.

This is the small tool kit I’ll grab to throw in my goruck if I think I’ll need tools while traveling.  It covers my bases pretty well.  Any more, and I probably need a work bench to.  Off to the basement.


Alinco DR-735T: Programming On Linux Through Windows

In my previous post on my Alinco DR-735t, I configured Virtual Box to share my USB programming cable from the host to the VM.  Last night, while attempting to add some Amateur Satellites to my radio configuration I couldn’t get it to mount.  I’ve had bad luck with sharing USB devices through VirtualBox, probably because I’m doing something wrong.  At any rate, I found a post from TechToolTip that showed how to mount a host’s serial device within the virtual machine.  This worked flawlessly, and I feel will be a robust solution.  The only disadvantage is needing to shutdown the VM to configure the port sharing.  I still haven’t found a way to program the radio directly through linux, and I’m not hopeful that Alinco will support linux. For now though, using this feature of VirtualBox seems to work quite well.

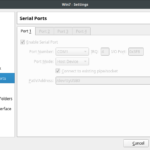
Because I had lost the previous configuration, I cloned the radio to my Virtual Machine.  Similar to how you have to highlight all the channels you want to send, you have to highlight enough channels to clone your current configuration within the radio.  That is, unless, you uncheck the “selection” box, as shown below.  Then the program will read and write all memories, regardless of what you have selected – which I feel should be the default option.


Pistol Crossbow Antenna Launcher

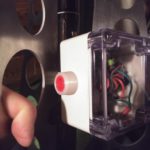
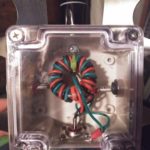
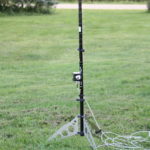
Sometime around June 2017, I built an end fed antenna with match box. End feds are not … great antennas but they are decent for the space they take up in a go kit. The way mine is currently configured works well down to 40M. End feds are basically a long length of wire, with a 9:1 UNUN to help your tuner match it to multiple amatuer radio bands.

The real question though, is how to get the blasted thing up in a tree. Generally, the higher you can get an antenna, the better off you will be (unless you’re trying to do NVIS, but that’s a whole other subject). I considered using a modified spud gun, but I haven’t had good luck with spudguns in the past. I also didn’t like the idea of having to either hand pump the cannon or bring an air compressor. The NPOTA I attended we did not have an easy solution for powering a compressor either. So, here’s the solution I came up with.


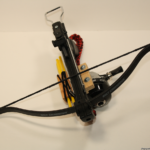
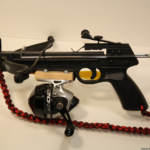
Originally, I had been planning on mounting a fishing reel onto a slingshot and launching a lead weight with the slingshot.  However, I was at a local farm supply store and saw a Bolt Crossbow.  I thought it was a much better solution (and more accurate) then a slingshot and smaller then a bow & arrow, so I bought it.  I had gotten the zebco 202 on clearance at walmart that I was planning on mounting to a slingshot for getting ropes high in trees.  Since this crossbow can handle both purposes, I decided to use it for that.

Then, I had some layout and decisions to make.  I wanted to have two bolts on board the crossbow, and then the fishing reel.  With that information, I laid out how large a piece of 1×4 I needed.  I cut a channel with the table saw for the crossbow to fit in down the middle of the block, then drilled two holes in the block.  Then I drilled and tapped the crossbow to mount the block.  I drilled two holes to mount the fishing reel, then drilled and tapped the reel so I could mount the reel to the block.  Finally,  I drilled two holes on the opposite side of the reel for the bolts to fit in.  A hair tie (stolen from a sister) retains them.

All in all, a pretty simple build.  I keep toying with building another version, able to be taken down making it smaller and more compact, based on an ar15 pattern rifle.

Parts List:

Additional Resources


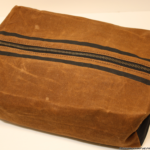
Dopp Kit Mark III

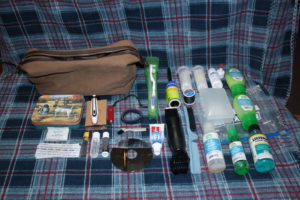
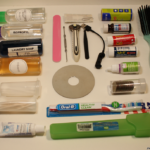
Knolled (not including spare razors and the phone cord)

Bagged

Upgraded Dopp Kitt Bag


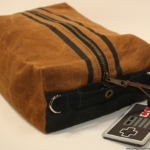
Here’s a 2019 update for my dopp kit.  I finally decided to add a handle to the dopp kit bag with d-rings on either side.  As usual, here’s an updated stock list for the bag.

WilzGear Semi-Custom Dopp Kit (minus the handle that I added).

Thanks for reading!


Traveling Well: Kitting Gear

“Two is one, one is none” algebraically equates to “two is none.”   I call rubbish on the whole idea.  When I was younger, I would have been a great boy scout.  I was always prepared, because I always had everything.  I’m now triple the age which strangely, simultaneously shows both how old and young I am.  I don’t like carrying everything everywhere anymore and my experience is I always take to much anyway – “if you’re not worrying about the ounces you’ll be crying about the pounds.”

2015 EDC

2018 Carry + Knolling

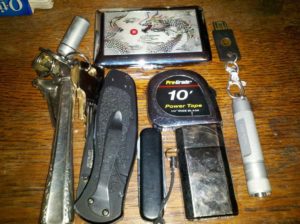
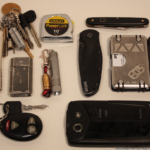
For my daily EDC, there’s a few things I always carry – cellphone, lighter, flashlight, tape measure, knives, and wallet. My keychain is kept light, both by pairing back the keys and modifying them to be smaller.  My EDC today is almost exactly the same as my EDC from 2015.  This is tried and true gear, tested, and carried for over 20 years.  I have quite a boring life – back and forth to work.  If I do find that I’m missing from my daily carry, I can either buy it, borrow it, or wait it out.

I feel like building is a “true EDC” is fairly easy, assuming you can follow step 2 of the steps below:

  1. Add things to your carry
  2. Get rid of them when you realize that you don’t use them.  You will apply this to 9 out of 10 things you decide to add to your carry.
  3. Bonus rule: Multipurpose is multisuck and not a reason to have a something of anything.

Building a kit … organically is much harder for me.  I tend to get an idea to build a kit for something, then start adding extra crap without having used the kit.  A specific example of this would be when I built a fairly expensive kit of tools to take shooting when I realized that 95% of my practice is done no more then 5 minutes from my work shop.  I don’t need a socket set and allen keys and more – I need to walk back in the house, lock it in the bench, and start working.  Oops.  Even the volunteer kit for my ham club suffers from to much rule one and not enough rule 2.  My shack in a box kit and my desk tool kit is being built with a different mindset of that experience.

But what about kits that God forbid you use?  I carry an an IFAK (Individual First Aid Kit) after deciding that having a CCW and not carrying an IFAK was a tad unreasonable – I’ll go out on a limb and say that using a IFAK is the more likely of the two and the least restricted as well.  How do you test and prove what is needed?  The best suggestion I have is to follow the guidelines of Tactical Combat Casualty Care.  There are a number of companies that will sell you a kit.  I recommend going with kit from ITS Tactical (as I’ve used their customer service which is top notch). I’ve heard good things as well about Dark Angel Medical’s training and Kits.  Buying kits from either will provided you with the enough to handle the two main “field killers” – extremity bleed out and chest wounds.  If you’re worried about how guns kill people learn how to save them, or at least keep your own ass safe.  The mind is the ultimate weapon, and the director of all else.  Returning fire is another mindset all together.

I wrote the previous paragraphs to set the stage to discuss duplication in kits.  I keep both travel sized Tylenol and a travel sized Motrin in my dopp kit.  I’ve also added them to my IFAK to make it more practical to it being part of my extended daily carry.  Another duplication I often see while traveling or building a kit is pens & pencils, and knives.

My concern with duplication is several:

  1. Duplicating consumables is double the things to mind.
  2. Double the items is double the weight and space you’re using for the same thing.
  3. Double the things to lose somewhere.

With that in mind, I try not to duplicate items in my carry unless there’s a significant reason to do so.  Originally I thought that I would end up removing the pain relievers from my IFAK, but now I’d pull them from my dopp kit first.  If I go anywhere with a bag, I grab my IFAK.  This means if a headache (as I usually get on Saturdays) decides to be worse then usual I’m prepared regardless of if I’m traveling or partying.  In this case, I’d argue that duplicate them isn’t a bad idea as they are both consumables.

I wish I could submit to you, the readers of the blog, a good rubric for when and why to duplicate an item, but I can’t.  In the end, I can only reference the three steps and suggest that you, as the minder of the ounces and carrier of the pounds, be ruthless when deciding what to remove from your bag.  For most of us, if there’s a real problem a quick stop to Walmart or Target and you’ll be back in business.


Travelling Well: Dopp Kit Mark II

Dopp Kit Mark I

If you haven’t read the Traveling Well: Dopp Kit post, you may want to head back in time to late 2015 and check out the configuration of my first Dopp Kit.  This post mainly provides an update about the contents of the iterated Mark 2 dopp kit, aka an S^3 bag (google “3s’s” if you don’t get it).

Building this kit out is what made me pose the questions of my previous post, Traveling Well: Kitting Gear. The thorny duplication subject specifically applies to the tylenol and ibuprofen that duplicate within my tcc kit.

Knolled

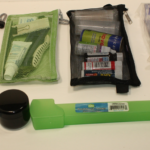
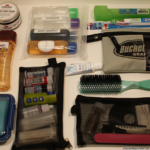
Bags within Bags!

All packed up

I’ve dumped items that I’ve never used in the last four years (here’s looking at you needle & thread), or items that I’ve went to a different version of (I trim my beard and hair using a full sized, wall plug trimmer now).  I upgraded the soap container to something that seals.  I keep a fresh tooth brush in the dopp kit, and change the one in the bathroom with it when I return.  That way I don’t have to worry about a moldy toothbrush in my dopp kit.  I’ve added a container of quarters so that when traveling I have change for the laundry mat.  Being able to wash clothes allows for less bulk while traveling.

When I travel, I don’t keep the bag in the bathroom where it will get wet and nasty.  Instead, I lay out a hand towel on the dresser or desk in the hotel room.  As I use items from the kit, which is kept near the towel, the items are laid out out on the towel to dry before being returned to the bag.

  • Bag 1:
    • Travel Tylenol
    • Travel Motrin
    • New-Skin
    • lint roller
    • eye drops (I grab these from the dopp kit even when not traveling as they have an expiration date)
    • Q-Tips
  • Bag 2:
  • Bag 3:
  • waterproof ziplock (TSA Regulation sized)
  • Left loose:
    • toothpaste
    • tooth brush
    • hair brush
    • body lotion
    • beard cream
    • soap in a sealing food container

Bag 1 & Bag 2 refer to these breakout bags.  Bag 3 is a bucket boss zipper bag I had handy.  They are stored with everything else inside my WilzGear Semi-Custom Dopp Kit. Most of these are sundry items from Wal*Mart (do they even care about the star anymore?). I’ve linked where appropriate for online items.

Thanks for reading!


Shack-In-A-Box: Onboard Power

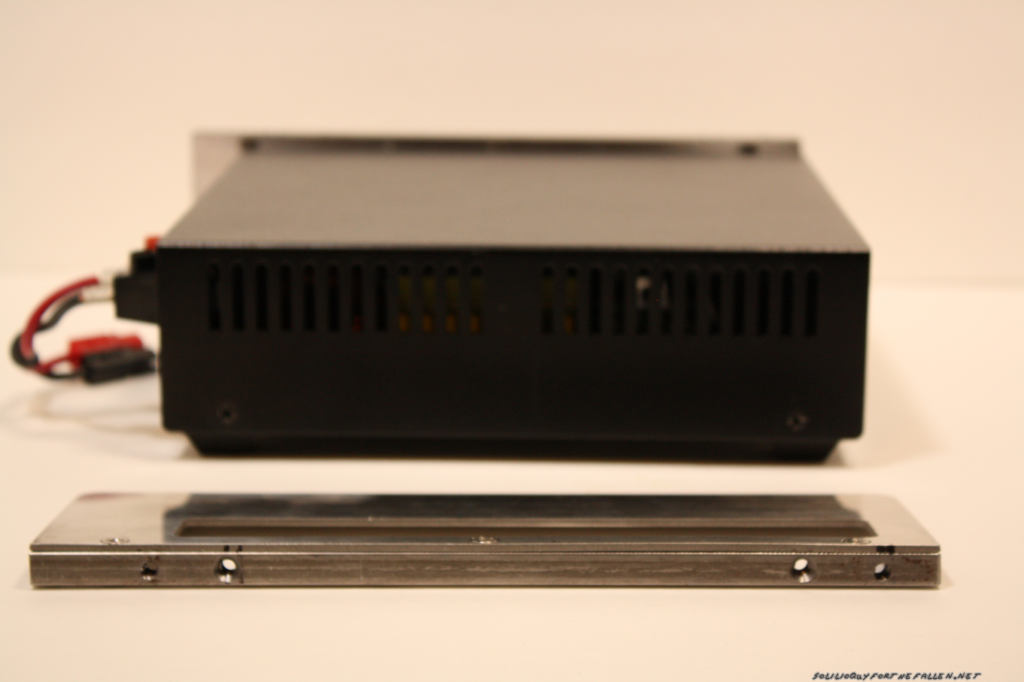
In a previous post, I documented the build process of my ham shack in a box.  Notably lacking was a power source to power the box, and this was something I decide that I would add and document in a later post.  Initially I though I would pull the server supply out of this box and mount it to finish out the calendar year, then purchase a solution like the Samlex closer to next year’s Field Day.  However, I decided instead of coming up with ways to mount two separate power supplies I would save myself the time and trouble and acquire the samlex supply this year.  There were issues with noise on the 80M band and I’m pretty sure the power supply was at fault.

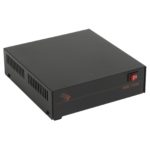
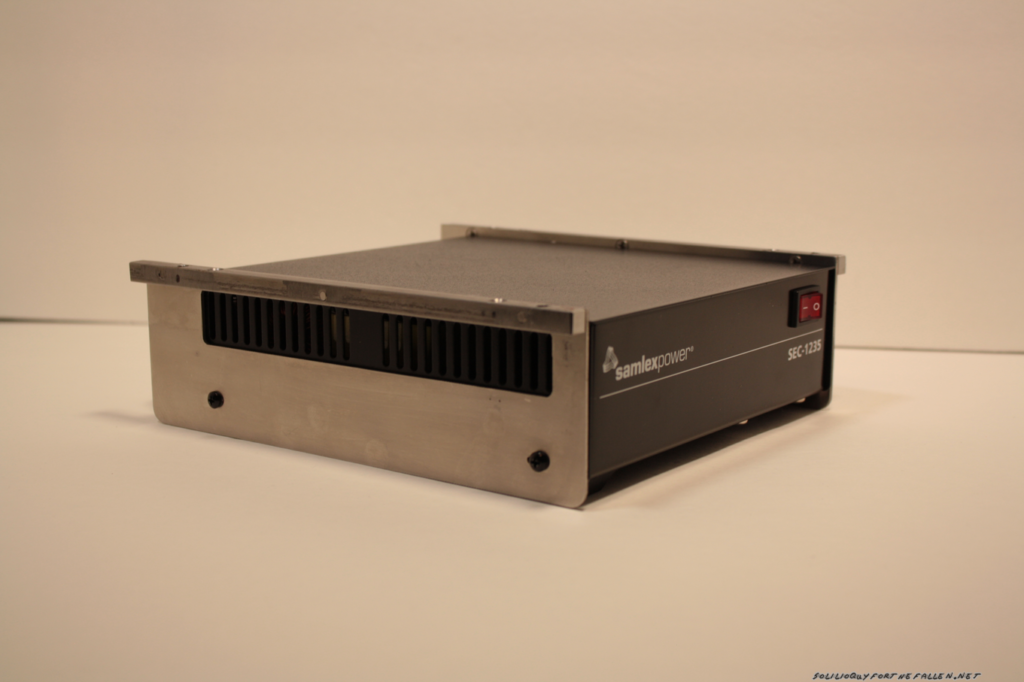
After searching the current market offerings, I selected the Samlex Desktop Switching Power SEC-1235.

This power supply was selected because it was relatively featureless, and could provide 30 amps continuous, and 35A Peak.  With the onboard power monitoring and the way I intended to mount the supply, there was no need for the SEC-1235M model, which has its own onboard voltage and amperage display.

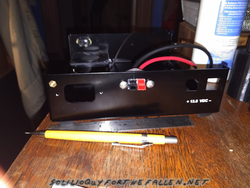
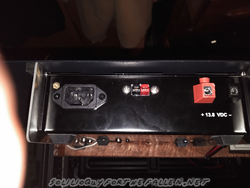
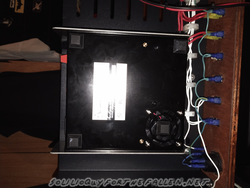
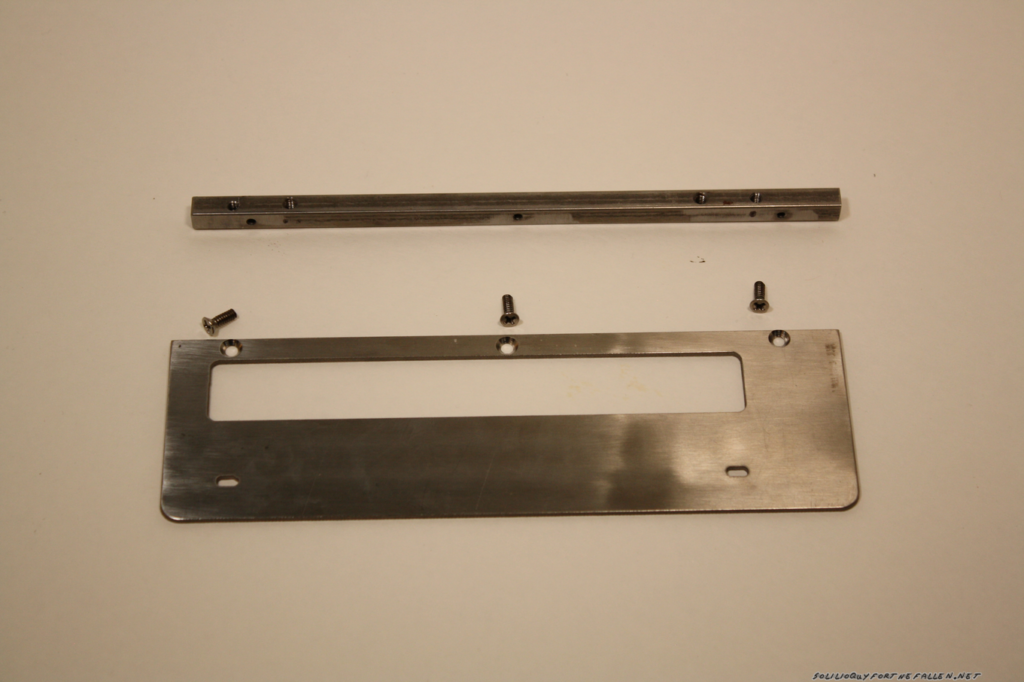
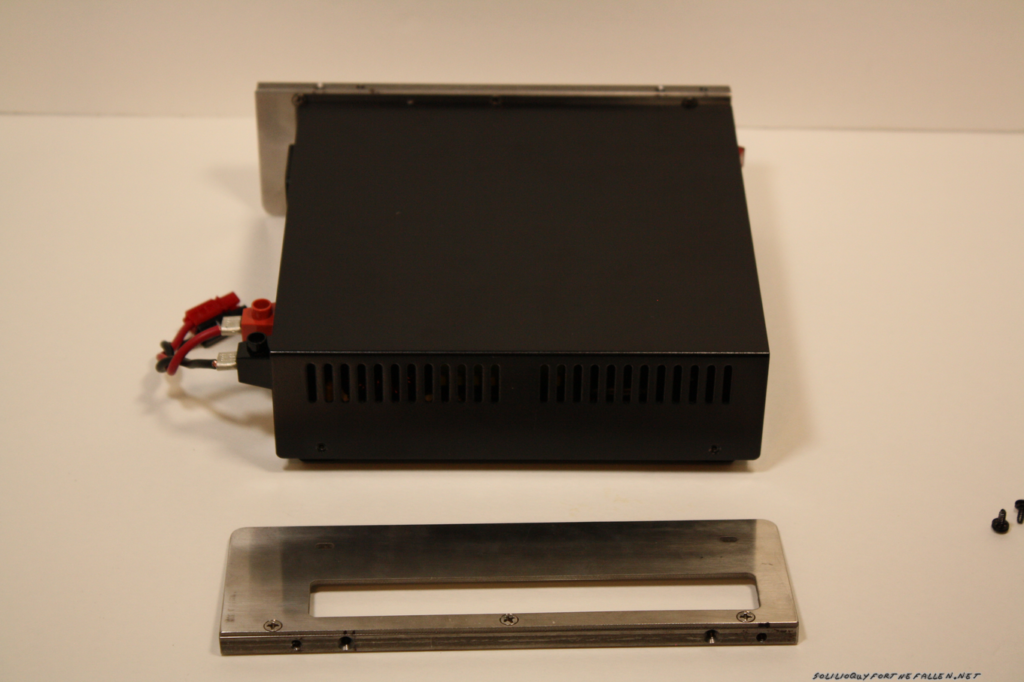
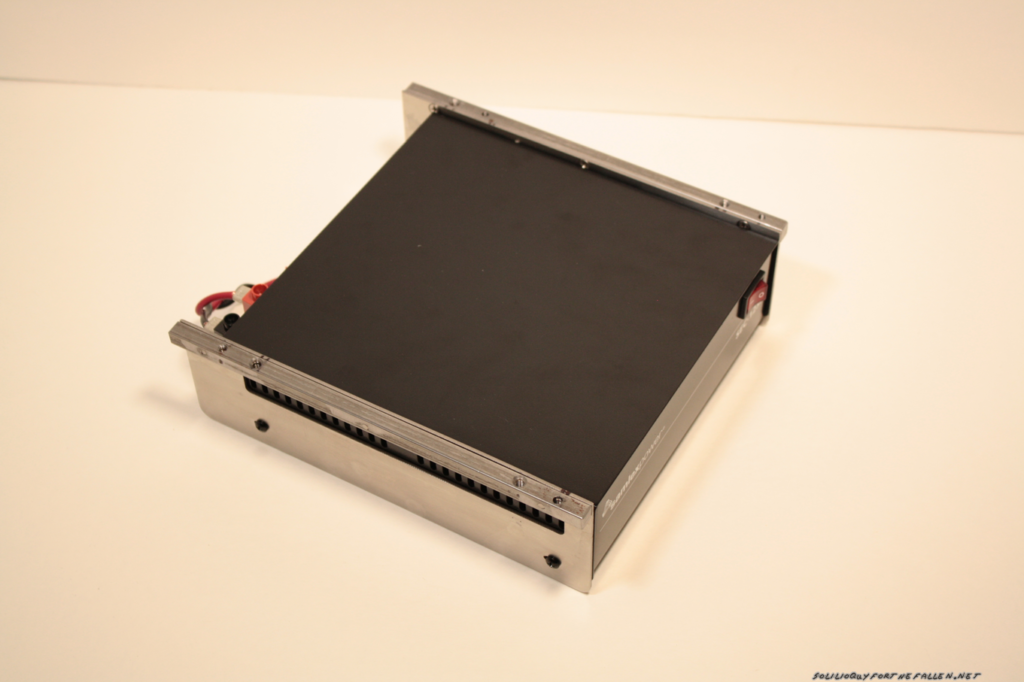
Samlex sells a mounting rack that allows you to mount a radio together with the power supply and I co-opted this idea for my mount. First, panels were drawn and a shop favor invoked for them to be cut on the water jet.  Then, I purchased keystock to mount the panels to, and to mount the power unit to the shack in a box.

Keystock drilled and tapped, panel holes cut & drilled

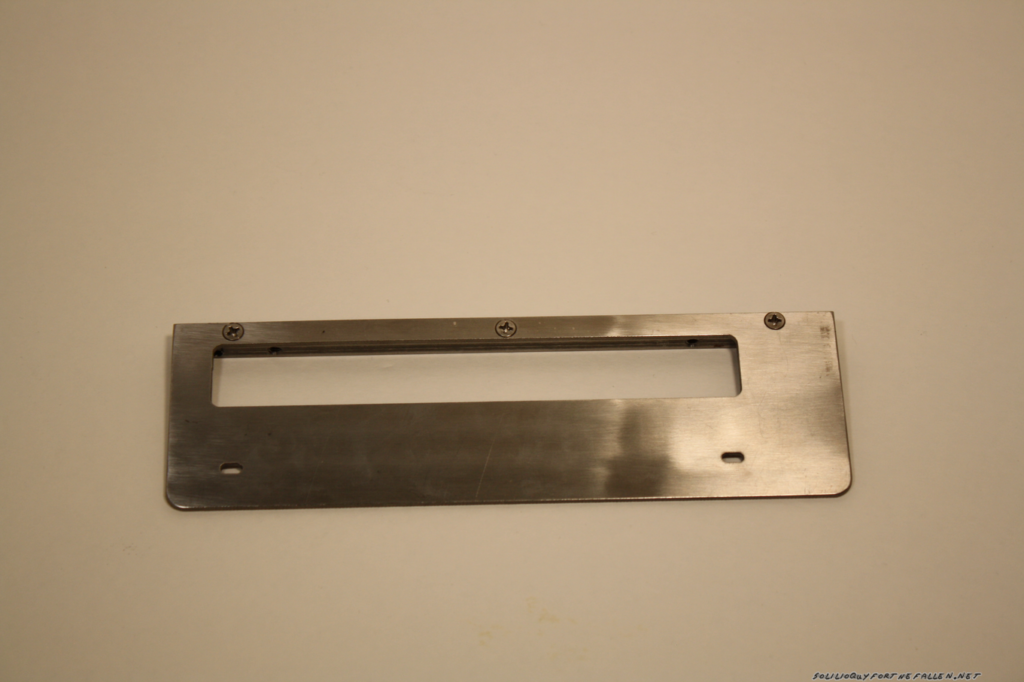
Keystock mounted. Need flat head screws for flush mounting.

Removing the factory screws and using original holes to mount the panels.

Another view of mounting the panels

Final Mounting

Another View

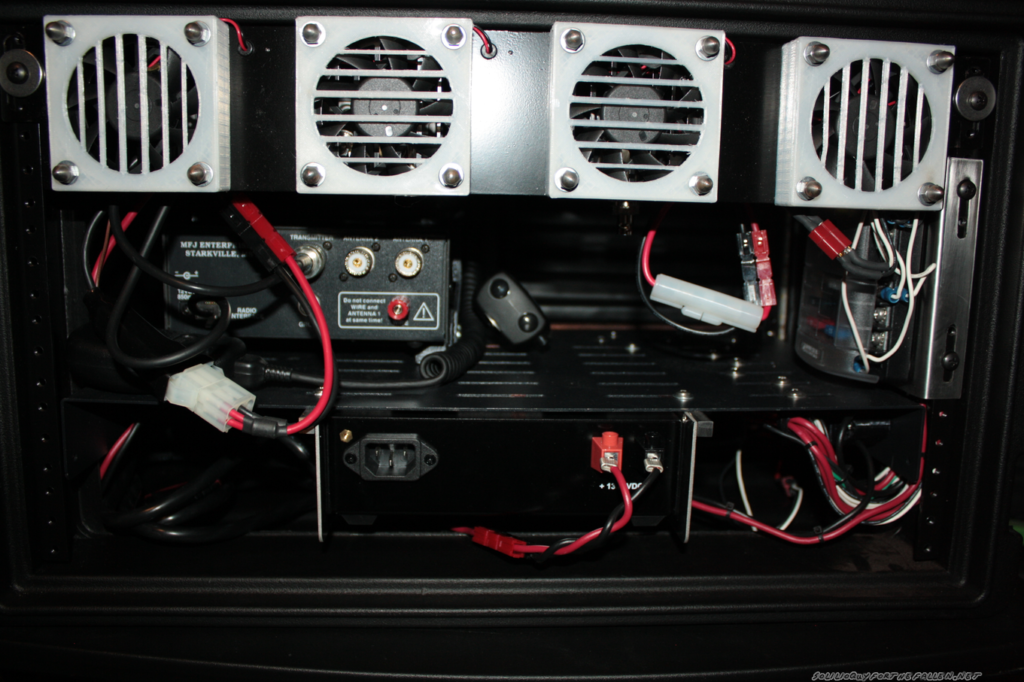
Fitted into the shack in a box


Cloning the Fluke T-Pak

I own a Fluke 87V meter. It has more buttons and features then you could ever hope to shake a stick at. It’s probably an overpowered choice for what projects I’ve done but since I never quite know what I’m going to end up working on, I feel its better to be over rather then under prepared. I bought it because of my dad’s Fluke 83. He’s had that for longer then I’ve been alive and I wanted a one and done meter as well.

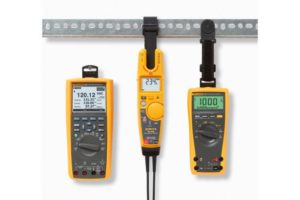
One of Fluke’s accessories for their meter line is the Fluke T-Pak, which allows you to hang the meter from any metal surface, by means of magnets.

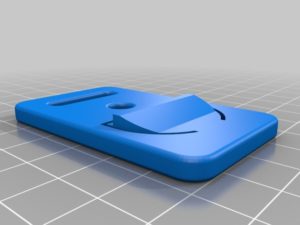
I was browsing thingiverse, and came upon a clone I could 3d print.

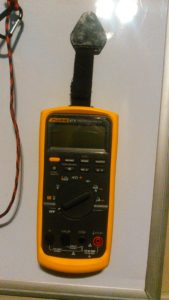
So, I commenced to print the insert. Once I had printed the insert I needed something for the magnets to press in to. I had to try a few different magnets to get the size that I needed, but finally settled on these magnets from grainger. I did have to epoxy & press them into the insert.

The end result is that for about $10 of materials I had successfuly cloned the fluke t-pak. With fluke charging about $45 for theirs, well I definitely had enough left over for a cup of coffee at Starbucks to write this post. What a day to live in. 3d printing is revolutionizing our world, whether we like it or not.

And in action:

Download the Base STL for free. Viva la Revolucion!


Shack-In-A-Box: Initial Build

What’s the point?

Go boxes exist across for a spectrum of purposes. Perhaps you have a sewing box, or a toolbox, or a box with everything required for D&D. By doing this, you have everything needed for that particular task and can be ready to go within a few moments notice – or not have to get everything collected for Friday’s game and you’re already late. Building a ham radio go box is no different – you can grab the unit, head out the door and and once on site have everything you need to operate.

I am primarily a portable operator (as a result of my HOA) who must set up each and every time. With a go box, having all my radios are mounted in a single portable box with the radio gear and power connections set up means I will have much longer to operate – and that much more isn’t left to chance.

I was inspired to build my go-box after joining the Ham Radio Go Box group on facebook. I ended up throwing my new 2m mobile in there as well as a result of starting to run my club’s monday night net. Here are pictures and remarks of the process.

What’s in the Box

Check out the for pictures. In the go-box, I have

  • HF + 2M/440 by the Yaesu 857d
  • MFJ 929 HF tuner connected to the Yaesu
  • 2m/440 + Crossbanding from the Alinco DR-735t
  • Built in illumination for dusk or after operations
  • Built in cooling for both radios
  • Onboard 120V power conversion and a power monitoring system for amp load and voltage (voltage is monitored on battery power)
  • USB Phone charging

Build Log

I drew an initial layout in cad to determine if I should purchase a 4u or 6u rackmount case. The rackmount system comes from the portable audio world and specifies a certain amount of space and a mounting system. Trying different variations, it was decided that a 6u box would provide for all the equipment I had currently, and some future expansion. I decided that purchasing a commercial rackmount would give me better results then building my own box as I have seen some do.

Ultimately, I selected the SKB 6U Roto Shallow Rack unit over a comparable Gator Box (or eurolite) for two reasons. The first was that the SKB features an internal gasket that while it won’t make the water proof, will certainly help keep out the spirit dampening rain storm. The second was that the SKB was better reviewed then any other rack mounts I had found. The additional sturdiness of the unit was worth the additional expense. I avoided the particle board solutions by Eurolite & Musician’s Friend due to the weight. Both the wood and plastic boxes are flight rated so there should be negligible difference in their durability with the weight of the poly boxes being at least half the weight of their wood equivalent. Radios & other things will make the box heavy enough on their own. Then, I needed to go from the vertical pillars of the rackmount system to a horizontal surface to mount the radios, tuner, and other gear. To rack them into the go-box, I ordered 1u racks from Navepoint. By ordering directly from Navepoint I saved about $2 each rack, exchanged an email for another $5 off, and still had free shipping. Much cheaper then purchasing from Amazon


I used the mounting brackets provided by yaesu and alinco for their radios. No reason to reinvent the wheel for a custom solution when what was provided works well. The radios were mounted in the slots in the navepoint shelves with the brackets that came with the radios from their manufacturers. You’ll note that at times the radio shelf is clamped a small masterforce vise. This method of keeping the shelf vertical to work on it works fairly well, especially when you let gravity work to your advantage. This is my go to method for handling the shelf when it is outside of the box.


A Blue Sea Systems 6 Circuit With Coverwas sourced from amazon. This helps protect the radios from short circuits with fusing, as well as providing a neat and clean way of distrubuting the power from whatever source I am using. I should note that its built with metric standards. Because of this, i found it a bit difficult to work with as I have minimal metric tooling. An initial fitting was done to make sure I was on course with the space requirements of everything so far. (I apologize for the potato phone pictures.)


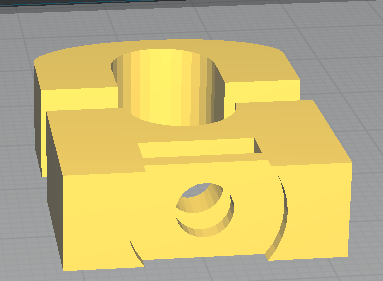
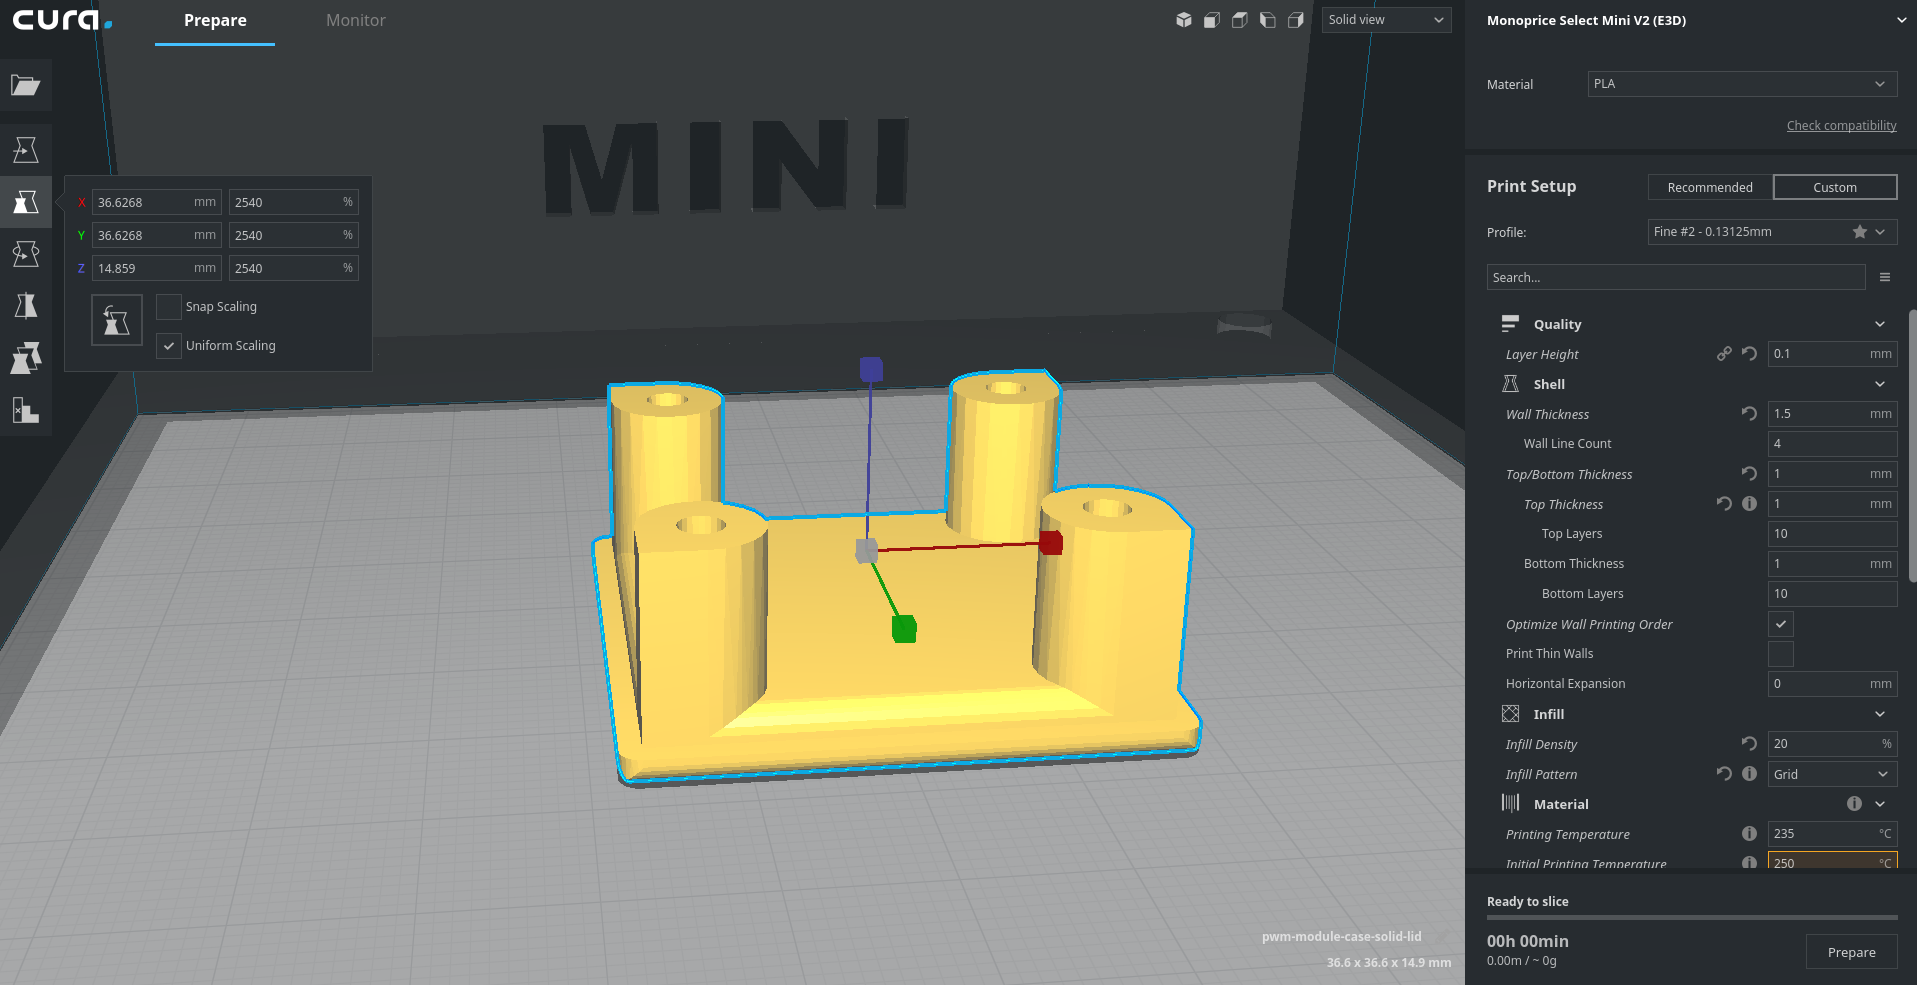
Because of my desire to run the system from a battery, I ordered DC Shunt Monitoring System from amazon. I chose this particular model as opposed to the some of the meters around for its low draw – and that I can shut of the monitor and have no draw at all. The system displays the current voltage of power system, amps in use, watts, and watt hours. I needed a way to encapsulate the shunt, so I designed and 3d printed a shunt box that would allow me to mount the shunt in any orientation. The bottom of the shunt box has two hex hole for a 6-32 nuts to press in. The top has holes for 6-32 fasteners to fit through and tighten via the 6-32 nuts. The center hole is to bolt the shunt mount on the frame with a 1/4-20 bolt. STL below. There are tunnels for the main power wires and the display relay wires.


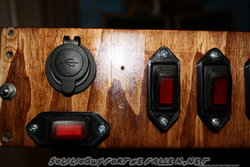
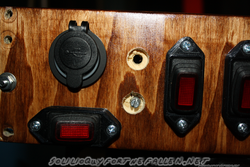
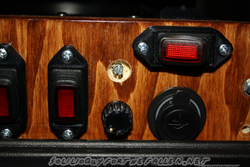
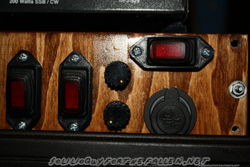
To mount the monitoring display, the power switches, and a USB charging port, I needed a small panel about the size of a 2u panel (3 1/2″ x 19″). The layout of the switches, power display, USB Charger, and control switches was mostly laid out on the fly. After layout, cutting, and test fits the board was sanded through to 400 grit and stained. Rustoleum Spray Lacquer was used as a protective coating. I found that laying the piece out horizontally and using heavy coats resulted in the best surface finish.

Each function of the box (such as the radios, the usb charging ports, the monitoring display) can be switched on individually. I sourced a number of 13.8 VDC 25A switches from Digikey instead of using lower amperage switches and relays – again with battery powered operation in mind. Because the switches were designed to be mounted in thin plastic, not plywood, I needed a way to engage the locking tabs on the switches on the board. Switch mounts were designed and 3d printed to engage the locking tabs on the switches and screw into the face of the board. The monitoring display was also made to be mounted in thin plastic or steel, so a frame for that was also designed and 3d-printed.


To keep the wiring neat and tidy as I run it to the switches, power supply, and more small wire mounts were designed and printed with my monoprice. An 8-32 nut is pressed into the slot, a #10 fender washer is placed in the top, and then it is bolted onto the tray with a 8-32 x 7/16″ machine screw for wires to run through. This helps keep the wiring tidy and supported.


Adding a feature I probably don’t need, stick-on LED tape was installed around front of the box. First the surface is prepped with isopropyl alcohol and then allowed to dry. The LED tape is applied, leaving the power leads in a supposedly convenient position. Deans Connectors were ordered to allow me to connect the switching panel to the LED tape. With these connectors installed, it becomes trivial to disconnect the lights from the switch board. High quality adhesive shrink tube was applied over the solder joints to protect against shorts.

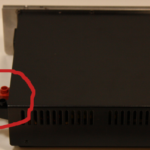
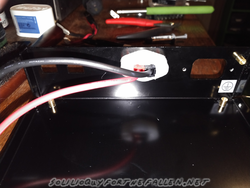
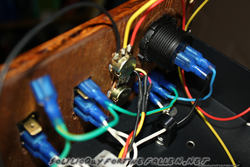
After this, I began the final fit up and cable management of the wiring inside the case. This was fussy, test, trim, retest, retrim, crimp, retrim, install, remove work that consumed the better part of four days of work. Cable management is an important part of any job and I didn’t want wires hanging in loose bundles looking like garbage – hence printing and installing the wire mounts. Here you can just see the power feeds for the radio fitted over the top of the shelf. They are then fed down through the slots in the trays to each radio. Later, I realized that I needed to open up the slots as an powerpole can’t be pulled back through. Two of the ventilation slots were cut to form a generous slot to pass the powerpoles through. These were cut with a dremel, and then some hand filing to clean up the holes. I also needed to remove a section of the top rack on the side so that wires could pass out from behind the distribution box and make the required connections. Again, this was cut with a dremel and then hand filed.


I had to decide how to hook up the radios – whether I was going to use the factory connectors or powerpoles. I ended up with a mix of the two. I removed the alinco connector and switch the radio directly to Anderson Powerpoles. For my 857, I decided to keep the yaesu connector because of the brown wire (a stupid item imho but best to leave it). Powerpoles were installed on the drops, then a generous coating of dielectric grease was applied. I’ve read that powerpoles corrode quickly so this will help keep them from oxidizing without damaging the ability of power to flow across the tabs.


Axial fans were ordered to provide additional cooling to the radios. The fans from digikey were selected to to provide maximum airflow with a low 38.5dBA noise. If needed, I can mount a rheostat to slow the fans and lower the noise, at the cost of airflow. A fan mount was drawn in cad, and a shop favor called in for the panel to be cut with a water jet. Once it came back from the shop, a coat of rustoleum professional grade primer and then rustoleum gloss black was applied. I refuse to utilize krylon paints in my shop. I broke a fan blade just by tapping with with my finger, so I clearly needed to provide some protection to the fan blades. A fan cover mirroring the style of the grid on the fan mount was designed and printed. I reasoned that the fans could push no more air then they could pull, and mirrored the design of the fan mount. To save print time in the future, I redesigned the guards to have a sleeve and cover. While the sleeve adds slight complexity to the walls and increases their print time, it will save roughly 3 hours should I need to redesign or reprint from breakage the guard grid in the future. Here are the sleeves, and the first & second iteration of the guard. Printing with just shoulders pressing against the fan saves an hour of print time on the monoprice.

Small rubber grommets were ordered and 3/32 holes appropriate for the grommets were drilled. Grommets installed, the wires were passed through the side of the guard, and then wired in parallel to a deans connecter which was then hooked to the appropriate circuit. As will the led lighting, this makes it easier to service various parts of the box. The fans are attached with 6-32 bolts and acorn nuts for a finished look. The fans pull air from the rear of the case and push it towards the front. The user of the go-box experiences a slight breeze.


A “rack” of sorts was designed and printed for the MFJ-929 HF Tuner paired with my Yaesu 857d. This rack barely fit on my monoprice – I had to set the bed size to 121mm x 121mm and get rid of the brim to print these. Taking advantage of rapid iteration through 3d printing, here is the mark 2 version of the tuner mount mount, which loses a mounting hole on the base, and eliminated the need to drill and tap the side of my tuner as I had originally planned. A slot that fits to the center screw on the side of the tuner helps center & retain the tuner in these mounts. Then, a sliding armature was designed that will insure the vertical retention of the tuner.

With the initially printed arms, I had issues with the print warping, and the arms tilting back. I lost some faith in the retention ability of the arms because of this. I initially planned on printing the arms in a way that they couldn’t warp from heat differences as the layers were applied. I changed from the initial arm design to Mk 2.5 to help reduce the print time, and to make things look nicer. After a test print with the arm at about 15° on the print bed I decided I didn’t like the results when I cleaned up the print. So instead, I printed two more arms, gently heated the pla prints, then pressed down with a wood slat to intentionally warp the print so that when bolted onto the mounts, they would squeeze down and against the print. Mk 1 & Mk 2 below.

The fan panel makes it harder to get to the pl-259 jacks on the back of the radios. To make it easier, I ordered and installed some right angle adapters to the radios. The 857 was connected to the tuner with a cable that has a right angle connector.


Closing Thoughts

At this point, I’m posting the build log. I will have to make a few updates for things such as integral power supply, hand mic mounts, and the smaller 2M antenna I’m building to keep in the go-box for deployments. However, the go-box itself is practically done.


There are a few things I will do differently for the next build. I would have a smaller switching section. The parasitic draw of the radios is not enough to justify the cost & trouble. If I was doing a SOTA where I had to hill climb for this, I would take a Yaesu FT-817nd or Yaesu FT-818. Still, for this box I think it all works well and I am in no hurry to tear everything apart to make Mark 2. Even though this is less of a go-box and more of a shack in a box I’m satisfied with the result.

Gallery

Go Box at Field Day

The go-box’s first deployment was the ARRL’s 2018 Field Day. Note that the tuner is retained by string and that the power supply is external. I simply ran out of time to get everything done.

Operated with my W4KGH End Fed Antenna (Doc 1, Doc 2) with 9:1 Unun, 55’ radiator & counterpoise. Worked well on 40M. 80M was barely able to tune. The noise floor for 80M was S5-S9 though so I was unable to hear anyone.


Random At The Bench

I had an issue with the amperage display reading incorrectly. Here I am verify the wire and testing its reading against my fluke 87V.


Parts

Ordered Parts

  1. SKB 6u Shallow Rack
  2. Blue Sea Systems ST Blade Fuse Block
  3. NavePoint 1U Racks
  4. Switches
  5. PowerSupply
  6. DC Shunt Monitor
  7. 12V Warm White LED Strip Lights
  8. 18 Gauge Stranded Hookup Wire, White
  9. 18 Gauge Stranded Hookup Wire, Black
  10. Deans Connectors
  11. Shrink Tubings
  12. Case Fans
  13. 90° PL-259 to straight PL-259 cable
  14. 90° UHF adapters
  15. Rubber Grommets

Printed Parts

Note: I have chosen to provide many of the solid model STLs for the 3D Printed Parts I used. 3D Printing is an incredible technology, and I amazed to be able to use it so easily. However, I provide these STLs without support. I may have suggestions or warnings but they are provided as is. I hope that they are useful to you, but they may not be.

  1. Switch Plates
  2. Wire Guides. Note – max capacity is 4 12 gauge automotive wires. A 8-32 x 7/16″ bolt will rack these perfectly with no interference to the wires with a .050″ fender washer and a 14 gauge steel shelf.
  3. DC Shunt Box STL’s
  4. Fan Sleeve
  5. Fan Cover
  6. Tuner Mounting Fixtures

Creative Commons License
These STL’s are licensed under a Creative Commons Attribution-NonCommercial-NoDerivatives 4.0 International License. I do not certify anything other then loosing your beer money over these. They may or may not be useful. Remember, only Hu can Prevent Florist Friars!


Getting Started With Fly Fishing

Once upon a time, someone gave me a fly rod & reel after I mentioned that I wanted to learn to how flyfish. Years later, I finally had the opportunity to take a class through the local forest preserve to learn how to use the thing and, of course, I ended up picking up new gear. This lead to setting up yet another kit for yet another hobby, though technically I never had a proper kit for the first fly rod. Based on what I’ve read in past and present, decisions (right or wrong) were made. Here’s what I assembled and why.

Assembling the Kit

Your gamefish of choice will dictate which kind of rod you should buy. Usually, I’m fishing for panfish like blue gills and small mouth (“smallies”) are all landable with a 5 weight rig. The fly rod I bought was a Browning 4 piece 5-6 weight because my casting instructor recommended it as a traveling rid. I was intrigued by the idea of having a small kit I could reasonable take everywhere I thought there would be an opportunity to fish.

Selecting a reel was harder. I finally elected to go with an Orivs Battenkill II, which will handle 3-5 weight line. First, I sorted through the chinese offerings from Amazon, as well as higher quality offerings from Bass Pro Shops & Cabela’s. While Bass Pro’s were better quality reels then Amazon’s chinese offerings, the reels were ~$60-70, cast aluminum and had disc drag systems. Looking at the offerings as an engineer, the Battenkill enticed me because it is made from solid bar stock (instead of castings), and a mechanically simple click and pawl drag system versus a disc drag. I believe the mechanically simple click & pawl, milled bar stock reel would be stronger & more durable then a cast reel with a disc drag of equivalent price. I also feel that the price was reasonably fair. The Reddington Fly Reel Zero gave me pause but I decided on the Battenkill for the same reason I don’t like glocks – plastic is for tupperware. I should note that the reel came set up as a left handed retrieve and I left it this way. My favored spincast, the Zebco 11t is also configured this way. A note – with this rod and reel combo, I can “cheat” down to 4 weight line on the rod or “cheat” up to 6 weight line on the reel which is a pretty comfortable range all things considered.

Then I had to select backing, fly line, leaders, and tippets. I would recommend using a dacron backing line and finally settled on some RIO backing from Ebay comparing price & shipping times. I had considered using mono as backing, but after purchasing dacron I’m a convert. Also, while researching the idea I found that the expansion of mono will cause damage to the spool. The dacron line is a bit like embroidery floss and bites the fly line better then mono could dream of. I only put roughly 1/2 the spool of backing on as I had seen some recommendations in my Orvis book to do so. Panfish are unlikely to run a 90′ length of fly line I think, but even 150′ of dacron backing should be more then enough.

For my fly line, I chose a weight forward, floating line in 5 weight. Typically, the floating line is considered the most flexible across the different applications of fly lines. Weight forward is good casting material for beginner and experienced alike per the Orvis book. I have read that sinking is recommended for panfish, my intended quarry, but I think I can compensate for this with my leader easily enough. If not, I’ll try a roll of sinking line then. I went with the White River due to the low cost of the line. I actually thought it was 90 yds … don’t be an idiot like me. The battenkill has enough capacity for the full 90′ spool of fly line. Unlike my last roll of fly line, the backing end was labeled.

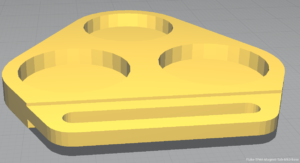
For a leader, I will be making furled leaders of 6/0 unithread. I’m going to make a separate blog post on the construction of furled leaders but you can see the general idea by checking out these furled leaders on ebay. I decided on furled leaders because of the relatively low cost of raw materials. Several leaders can be made from a single roll of unithread. To keep the leaders from getting tangled during storage I 3d printed some leader holders that I found on Thingiverse.

I’ll use a piece of simple 2lb test monofilament as a tippet. I haven’t seen a reason not to.

I did buy a fly fishing vest, and went with one that is 100% cotton. Realize that fishing is likely to impart a certain fishy smell dirty done right. While the newer nylon vests are neat, they won’t handle a washer & dryer like a good cotton vest will. I also figured that being a germophobe I would want to was the vest often enough. I found a lightly used offering on Ebay. $20 later it was mine and it arrived in a few days. Until I get my preferences settled out, I do tend to buy a cheap. No need to buy twice cry twice because I couldn’t try it out in a store.

Tying it All Together

There are many different knots that need to be used to put a fly reel together. Here is the list, sorted from the reel to the tippet. These are the knots recommended by my LL Bean Fly Fishing book I purchased.

Final Thoughts

I’m not saying that I made the right decisions, but I feel that this kit has as much ability to catch a fish as the next. That’s what I’m after. If its sub-optimal then there’s a good chance its user preference and not something I can find in a book or youtube videos online. I’ll leave a list of my complete kit below, as well as some recommended resources. Thanks for reading.

Complete Outfit

Recommended Resources