Category: fedora linux

Radioddity GB2-D “Review”

I wanted an inexpensive DMR radio for one of my vehicles so somehow I ended up with the Radioddity DB25-D.  From what I saw it was about the best wattage for the least money once I shopped around and found it on a flash sale.  I paired the radio with an inexpensive Retevis antenna from amazon.

At the moment, my one word review is ….. “don’t.”  It’s a weird little radio with a particularly offensive “flaw” which I’ll discuss in a moment.  Otherwise, the purpose of use was to monitor my DMR repeater and to test its range in the area.  It seems as though it will suffice in that application.

So, “the issue.”  When I first set up the DMR talkgroups, I couldn’t hear anything come back – it was like the radio was muted.  But I could hear analog stations just fine.  Then I reset the radio, it set the radio to “promiscous” which is a DMR term for hearing all talk groups being broadcast by the repeated.  Which made the isssue more confusing.

What I finally determined was that unless you set an Rx group, you will hear nothing.  The solution is to create an Rx group for each talkgroup and then only add that talk group to the rx group.  It’s stupid and madness and not what the CPS guide says.

Another item on the list of complaints is though this is Radioddity’s radio and I bought it from them … it came with outdated firmware.

On to other issues: the CPS is windows only.  It’s possible to use MM7DBT’s codeplug editor in linux by using wine to run the program.  On Fedora 37 I also needed to install winetricks, then use winetricks to install dotnet47.  This will install the needed libraries and you can then run the codeplug editor.  The installer worked fine, but when attempting to run the codeplug editor I got a weird error about mono libraries.  Installing dotnet47 also install mono.

It looks like there’s ways to use serial ports in linux through wine, but a forum post led me to a python script that doesn’t work.  It’s definitely not the fault of @davidmpye as Radioddity has likely changed enough of the codeplug format so that it’s no longer compatible with the rt73.

I did find out that I can program on Fedora Linux with the Radioddity CPS.  First I needed to add myself to the dialout user group. Then I did the registry addition described here. Then, log out & in.

For posterity:

Configure the port–if the device is seen at /dev/ttyUSB0, and you want it to appear to WINE on COM1, edit HKEY_LOCAL_MACHINE\Software\Wine\Ports to have a new string entry named COM1 with value /dev/ttyUSB0

That’s all I have for now.

An Update. Not too notable.

Hrm, what to update on?  My last post was released roughly 4 months ago.  Who could have imagined where we would be today?  Corona is … mostly a ploy to destroy the economy in the wake of the November elections.  There are some real medical issues that could be present but its to the same group of people who are vulnerable to the seasonal flu.  Its time to get back to work America.

Having addressed that … what else is there to talk about?  Let me rummage about here.  This is more of a scrap bin update so … things might be rough in places.

Projects

The biggest change is that I have a new shop.  I would love to post pictures but operational security and all.  The new shop gives me better capabilities.  I’ve also expanded what tools I have on site.  A basic stick/tig welder, lathe, and work bench are all welcome additions to my capabilities.  I’m looking forward to starting my own business and maybe escaping from the nonsense that is corporate America.  My sales site is already listed on here, but for kicks, check out my offerings at underthebedstudio.com.

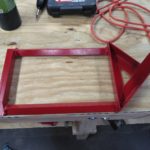
I also built a painting cabinet that helps keep the fumes down in the house and give excellent finishes to parts I need to paint.  One of the first projects that I used it for was a drive over antenna base.  My intention to use this at the remaining service events this year that don’t get cancelled as a result of the Panicdemic.

Another cool project I worked on was a Cigar Punch.  With my 3d printer I was able to iterate through designs pretty quickly.  I threw out the iterations but took a picture first:

Only took me 6 tries to get to the form factor I was happy with.  I also finally found a pre-hardened material to make the punch itself from (drill bushings), which was the cause of Mk4 & Mk 4.1.

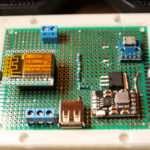
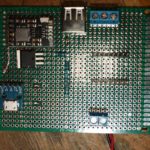
While I was looking at a few things, I ended up buying an ESP-12s which I found prebuilt firmware that would let me use it as a serial port over wifi.  Pretty sweet.  So here’s my interpretation of it:

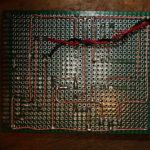
Here’s the Schematic for the protoboard above. It uses an 18650 cell under the board for powering everything. And here is the STL for the carrier. I used standard 8-32 screws to hold the protoboard down.  The charger circuit chip is here on Amazon.

Computer Jazz Hands

A few computer things that I’d like to talk about.

First up is the Retroflag GPi.  This is a pretty slick little box that takes a Raspberry Pi Zero (Wireless if that’s your thing) and turns it into a self contained Retropie gaming machine.  Being that its a Pi Zero, it struggles with anything over Super Nintendo but works pretty well for lots of other things.  If you’re into gaming I highly recommend it.  I just wish every single pi unit with the exception of the Pi3 wasn’t so damn finicky.  I do have scripts that allow me to turn off the wifi and the bluetooth and also rsync over wireless.  Code at the bottom.  One thing I would recommend to everyone – just get a bluetooth keyboard at the same time.  Normally I would recommend a 2.4ghz USB keyboard (I’m a fan of this one) but with the Pi Zero and the GPi case – bluetooth is best. I ended up with this one.

Ah, the Hak5 Jasager.  They released the firmware 2.4 for the Mark V a month or so ago.  I hate to say it, but I’ve never really gotten the thing to work as well as I would like.  I’m always fighting with it, and it seems to be always corrupting sd cards – which kills my plugins.  At this point, I would be hard pressed to buy the Mark VI.  Hak5, thanks for all you’ve taught me.  Best of wishes.

What about a Pwnagotchi?  A wifi auth key hacking tomagotchi?  Sweet.  But my dislike of RasPi’s still applies.  Also, its 2020 and now that I ponder the idea – I only see a couple of wifi configurations in the “wild.”  The first is with a proper WPA2 password which can be tricky to catch and crack.  The other is a captive portals with open associations.  And no, fortune 500 employers and authentication portal doesn’t secure the traffic of the users.  With open associations, no reason to associate.  Just grab it from the air.

I built myself a FreeNAS box last year as well.  This makes it super easy to back up my laptop across the network.  A few recommendations

  • Wire your network.  Seriously.  The speeds of a wired 10/100 easily exceed the speeds of wireless.  While you’re at it, this is an excellent time to learn how to make your own network cables.  Pick up a 100′ Cat5e cable and a crimpers + ends and go to town.  Custom length cables make management much easier.
  • Put in a “dumb” gigabit switch between your main computer and the freeNAS.  I bought this one, but I couldn’t tell you if it would better then any other.  Going to gigbit?  Amazing.  Most files get transferred before a status window can open.  And backups – ironically 10 times faster.
  • RAID.  RAID all the things!
  • And, do yourself a favor.  Get a cheap UPS to put the freeNAS on so minor (or major) power outages let it fail gracefully.
  • Having a well spec’d FreeNAS box lets you run servers all the time.  I have one that starts up to handle my DNS requests.  I’m running the Pi-Hole distribution because I’m not a fan of ads.  Or the tracking nonsense that they do.

Getting a FreeNAS box set up was awesome.  I highly recommend it.  Right now, I’m loving everything about it.

I’m still running Fedora 30 on my laptop.  I’ve never really booted to the Windows 10 installation that came with it – just to shrink the partition and I’m considering getting rid of it when I update to Fedora 32.  I’ve held out against Fedora 31 long enough that I think I’m going to wait for 32 now.  I usually do a fresh install.  To many things can get muddled when doing an update and a fresh start it always nice. Probably make an image of the HD again before I wipe Windows 10 though.  Shout out to Clonezilla.  Thanks guys!

Miscellaneous Topics

Affiliate Links.  There’s still no affiliate links here on the blog, and there will probably never, ever be unless the players change their tune.  As I figured, they’ve started to weaponize the Terms of Service and its just not worth it for the little money.  If the Youtube Adpocolypse can hit somebody like Demolition Ranch …. it will happen to anyone.  Free Speech is important – don’t let yourself get caught in the trap.  By the way, COVID-19 is totally Commie China’s fault.

Social Distancing.  Ugh.  Seriously?  Why did it take this for people to realize that door knobs, pin pads, and people are nasty?  They’re just nasty.  And, stay the hell out of my face.  COVID or not, I don’t want you within reach.  Just back off.  If you’re close enough that I could reach out and kick you … maybe you should back up just a touch.

Drones.  I would love to get a TinyWhoop with FPV.  I think it could be super useful and handy.  But then I look at my other drones that I never touch and convince myself its to much.  Drone guys, keep it up.  I’ll have to live vicariously through your youtube videos.

Macro Lens.  Why did I not buy one of these before?  They are super awesome.  I’ve messed with macro tubes, but they don’t work as well as a macro lense does.  I highly recommend buying refurbished lenses and flashes directly from Canon.  They’re a little more (like … $20) then what you would find for used prices, come with a warranty, and free shipping.  I’ve always been super happy with Canon equipment and their repair shop.  Seriously though, is this not gorgeous?  Having a macro lense is great for documenting any of the fiddly things I do, like below.  And honestly, I can see it being “one lense to rule them all” for me.  The kit lens is a close second.

I recently went through an purged my youtube subscriptions.  I think I got rid of half of them – many had been deleted or I no longer watched them.  A few channels to shout out:

  • Andrew Klavan – I love his satirical intros.
  • Marling Baits – He makes fishing baits, and good videos just to have playing.
  • This Old Tony – Dad Jokes and Machining.
  • AVE – irreverant as f*ck.
  • Ivan Miranda – massive scale 3d printing projects.
  • Project Binky – in Colour! Dry british humor, and the only car show I’ve ever liked.
  • Townsends – this man would have killed it on PBS when I was a kid.

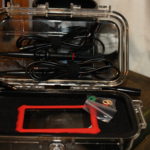
The DS213 o-scope.  Not a bad little device.  Short on features, but for the price tag not a bad deal either.  It let me see some things I couldn’t see with my multimeter.  I have a proper oscope I need to repair, but to be honest I’m scared of the high voltage that’s inside.  I found a drybox case online that holds this and the probes perfectly.  Standard USB charging nonsense.

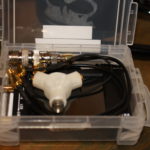
While I’m at it, check on the NanoVNA.  I’ve only really used it for checking SWR but there’s apparently a ton more that it can do.  Here’s my kit, with the adapters I’ll need to get it to work with my equipment.  As big as my go box and antenna setup is, its nice to know I can through this in my messenger bag or goruck with my laptop and be able to make some quick checks.  This does standard usb charging as well but it wants a USB-C cable but doesn’t implement the fast charging spec.  A waste.

Other Life Stuff

Still need to get digital working in my go box.  Hopefully taking the time this week to put my HF rig on a dummy load and do the experimenting that I need to do.

I could really use a vacation.  Somewhere tropical, sunny, and hot would be nice.  Maybe via a cruise ship?  Prices went through the floor now …..

Mentioning drones and how its not really something, I’d really love a Yaesu FT-818.  Oh well, I probably wouldn’t use that either.

In Closing

Rock on folks.  I’m going to peace out for a bit.  Hope you enjoyed the randomness presented above.

RetroPie Scripts

Make a folder in the RetroPie roms directory called “bash” – mkdir -r ~/RetroPie/roms/bash

Copy over bash scripts. I have scripts for enabling and disabling the wifi adaptor, as well as using rsync across my LAN for rom directory syncing

Copy bash-mod/configs/bash into /opt/retropie/configs/

Copy over bash-mod/theme/bash into /etc/emulationstation/themes/carbon (or whatever theme you’re running is)

sudo /etc/emulationstation/es_systems.cfg and add the following code to the <systemlist> tree:

						<system>
							<name>bash</name>
							<fullname>Bash Shell</fullname>
							<path>/home/pi/RetroPie/roms/bash</path>
							<extension>.sh .SH</extension>
							<command>/opt/retropie/supplementary/runcommand/runcommand.sh 0 _SYS_ bash %ROM%</command>
							<platform>bash</platform>
							<theme>bash</theme>
						</system>

Restart Emulation Station

bluetoothdown.sh

#!/bin/bash

sudo rfkill block bluetooth

bluetooth-up.sh

#!/bin/bash

sudo rfkill unblock bluetooth

wifi-down.sh

#!/bin/bash

#sudo ifconfig wlan0 down
sudo rfkill block wifi

wifi-up.sh

#!/bin/bash

#sudo ifconfig wlan0 up
sudo rfkill unblock wifi

Installing OpenWebRx On Fedora 22

I’m a pretty regular viewer of Hak.5. The point still matters. Hak5 Season 19 Episode 16 featured OpenWebRx, a pretty awesome web powered interface for an SDR dongle. I thought it would be useful for monitoring my ham club’s repeater. OpenWebRX is kind of limited in its use cases (to my mind) because of its limited frequency range. It neatly centers about 15 Hz on either side of the set frequency. The author states that its because of the multiuser intentions behind the software. However, that doesn’t mean OpenWebRx still can’t be useful – or fun to play with.

For my use case, I have two purposes:

  • General monitoring of my club repeater. Even though I have a baofeng docked and listening, I like the thought of it.
  • Another use is to slide down the frequency range touch and be able to test radio microphones without needing another person to phone back – plus I’ll actually be able to hear myself.

While not a flaw of OpenWebRx, the listening range of the SDR is pretty limited – at least with the stock antenna. At present, its not able to hear my club repeater. I’ve picked an adapter from Amazon in the hopes that putting something bigger then a measly 6 inches will pick up my club repeater. After attaching my 1/4 Wave Ground plane, there was noticeable improvement but it was still hard to hear the repeater. Local copies are very strong however, using my 5 watt HT.

There are no install instructions for installing from source in Fedora and there is no package within the Fedora repos. At present, you will have to use the dev branch of openwebrx for the system to run. You’ll see (if you read the ticket) that I promised the developer install instructions for Fedora. The following are the commands I used to get OpenWebRx running on my Fedora 22 headless server.


#OpenWebRx Fedora 22 Install Script(ish)
#Get OpenWebRx dependencies from the repos when possible (assuming you started with the same packages I had - you may need to install Development Tools, among other things.  I often install from source.)
su -c "dnf install dh-autoreconf fftw-devel libusb-devel -y"

#Get openwebrx source from github
git clone https://github.com/simonyiszk/openwebrx
cd openwebrx
git checkout dev #and switch to the dev package so it will run on Fedora 22

#Get openwebrx dependencies not provide by the fedora repos
git clone https://github.com/simonyiszk/csdr
cd csdr
git checkout devs #also need the dev version of this
make
cd ..

#need to build rtl-sdr from source - since udev isn't installed apparently by the repos, so .... yup, build from source
git clone git://git.osmocom.org/rtl-sdr.git
cd rtl-sdr

#build guide available from http://sdr.osmocom.org/trac/wiki/rtl-sdr
cd rtl-sdr/
autoreconf -i
./configure
make
su -c "make install && ldconfig && make install-udev-rules"

#openfirewall port since I want to be able to access this from across my lan
firewall-cmd --add-port=8073/tcp --permanent
systemctl firewalld restart

At this point you have to do some configuring to the config_webrx.py file. Go ahead and pop it open in your favorite editor, and add in the required info. One important thing to note, use the local lan address for server_hostname=. Also, note that openwebrx supports opening your server to the world. My DSL won’t support it so I’ve decided to disable that feature for the time being.

To run openwebrx, a simcple chmod +x openwebrx.py && ./openwebrx.py will get you up and going. For running openwebrx unattending, you need to use screen or tmux. Using nohup doesn’t work and creates a mess.


openwebrx-screenshot


Yubikeys and Udev Locking

Impressions

I recently bought a yubikey after attending BSides LA and meeting an individual that used one to secure his gmail accounts. $30 and about a week after ordering, I had a yubikey of my own. I keep it tethered to my new fenix flashlight (which the jury is still out on) so that I can find it easily and will remember to take it with.

Now, I’ve been concerned about the physical security of my devices for awhile. If you know my simplistic password, bingo, you’re in. With the yubikey, I was able to change that. It now takes both a token and a password to log into my computer. Plus, I’ve been intrigued by the yubikey since the Fedora Project started using it a few years ago.

Yubikey toughts its one time authentication token as its primary feature, but the yubikey has more then just that. You can choose any two of the following modes:

  1. One-Time-Password
  2. Challenge-Response
  3. Static Password (32 character limit which saddens me)
  4. O-auth

Challenge-Response Auth Tokenization

When I plan things, I always plan on my internet connection not working or being unavailable. To me, the only usuable features of the yubikey are challenge-response and static password. So, I setup challenge-response in the first slot and static password in the second. Then, I set about requiring the challenge response token to log into my account.

This post from the Vermont Linux and Unix User Group has a great guide on setting up challenge-responce on your device. I’ll summarize:

  1. Install pam_yubico and yubikey-personalization-gui
  2. Edit /etc/pam.d/system-auth to include: auth [success=1 default=ignore] pam_succeed_if.so quiet user notingroup yubikey auth required pam_yubico.so mode=challenge-response
  3. Run the following commands after inserting your yubikey: sudo ykpersonalize -2 -ochal-resp -ochal-hmac -ohmac-lt64 -oserial-api-visible sudo groupadd yubikey sudo usermod -aG yubikey username

You should now test that everything works correctly by pressing ctrl+alt+f2 and trying to login with and without the yubikey. Do not log out of all of your sessions – if something’s broke you’re going to want to be able to fix it for sure!

Now, what I’ve implemented on my primary laptop doesn’t really secure the data, and I understand that. Sadly, I’m unable to fully encrypt my hard drive because of the triple boot with windows. If you know the harder root password, you can easily bypass my login and see the data. Or, you could boot an external USB with its own OS and view the files. When I finally purchase a new laptop next year, full hard drive encryption with a single booting OS is on the docket.

Udev Locking

Now, what if you want the screen to lock every time you remove your yubikey? You can try to do that with udev. Udev is the monitor system on linux that reacts when devices are plugged into a computer. The Vermont LUUG page has some guides on how to make it work, but here’s what worked on my system (mostly).

  1. `su -c "yum install -y slock"
  2. touch /etc/udev/rules.d/98-yubikey-rules.rules. If you do not end the file in .rules, then udev will ignore the file.
  3. Add the following text to that file: SUBSYSTEM=="usb", ACTION=="remove", ENV{ID_MODEL}=="Yubico_Yubikey_II", RUN+="/usr/local/bin/ykgone"
  4. touch /usr/local/bin/ykgone
  5. Add the following to that file: if [ -z "$(lsusb | grep Yubikey)" ] ; then /bin/su USERNAME to be your username.
  6. touch /usr/local/bin/lock
  7. Add the following to that file: DISPLAY=:0 slock
  8. chmod +x /usr/local/bin/lock && chmod +x /usr/local/bin/ykgone

Debug

While there is plenty of other posts and ways on how to get a system to lock when the yubikey is pulled, there’s very few on how to debug the udev system. The command that I found the most helpful was udevadm test --action="remove" /devices/pci0000:00/0000:00:1d.1/usb3/3-1 which tested what would have if I removed something. That helped me figure that without my udev rules ending in .rules it wouldn’t be used. You’ll need to change that device address to where ever you are mounting your yubikey. udev monitor will spit the device address whenever you remove or insert your yubikey.

Mostly

I said mostly, because for whatever reason I couldn’t get my system to lock properly with anything other then slock. Also, slock doesn’t require my yubikey to unlock the system. There’s no selinux denials that I can see, and I’ve stepped through as well as I can.

At this point, I’ve decided that I’m better to remember to grab my yubikey and press ctrl+alt+l to lock the system – at least then it requires proper two-factor auth to get back into my compuer.

Ending Thoughts

The yubikey works fairly well. I’ll be able to use it as a challenge response key for full hard drive encryption in the future. I’m not thrilled that the static password can only be 32 characters long. It should be 64-128 long, or more. It’d also be nice if the company could add a third programmable slot so that you could still maintain the OTP functionality without loosing the ability to use 2 very good offline usable authentication methods. But at $30 it may be to much to ask.

Should you buy it? If you want that extra auth token on your computer? Yes. What if you want to experiment with second-factor authentication? Sure. At $30 shipped, its a reasonable start. But if you’re passive about authentication the yubikey just doesn’t make sense.


Notes on Fedora 17 (In the context of an Asus 1015PED-MU17)

So, recently I started having trouble with the broadcom-wl driver that I was using. For those that don’t feel like searching, I will briefly summarize.

OliverK@Firefly|10.13.37.21|~ α lspci | grep Network
02:00.0 Network controller: Broadcom Corporation BCM4313 802.11b/g/n Wireless LAN Controller (rev 01)

The Asus 1015PED features the Broadcom 4313 wireless adaptor which until now required the use of the broadcom-wl driver. Except about a month ago my system began kernel panicking, which is a little bit like Windows bluescreening. What to do? Searching for the error revealed nothing of interest so I chose to do a fresh install of Fedora 17.

This has actually fixed my problem, but not due to the broadcom-wl module being wrongly configured. It now appears that the brcmsmac module is now the preferred driver for this wireless card. I presume that you can install this with something like yum remove akmods-wl and then yum install brcmsmac. But like I said, I did a clean install so I am not sure.

Another thing of note is that in Fedora 17 “support” for using joysticks has been removed. Thanks to this post. Bleh.

$ sudo -c "yum install kernel-modules-extra joystick"

I’m still busy rebuilding my system, but I’ll post if I find anything of note.

Also of note:
OliverK@Firefly|10.13.37.21|~ α iw list <snip>
Supported interface modes:
* managed
* monitor

Maybe we now have native monitor mode? I don’t know since I have the alfa adaptors.


Fixing Wireless on Fedora 16

[10:58:11] root@SoliloquyBook {/home/OliverK α yum install kmod-wl
Loaded plugins: langpacks, presto, refresh-packagekit
Setting up Install Process
Resolving Dependencies
--> Running transaction check
---> Package kmod-wl.i686 0:5.100.82.112-2.fc16.7 will be installed
--> Processing Dependency: kmod-wl-3.2.7-1.fc16.i686 >= 5.100.82.112-2.fc16.7 for package: kmod-wl-5.100.82.112-2.fc16.7.i686
--> Running transaction check
---> Package kmod-wl-3.2.7-1.fc16.i686.i686 0:5.100.82.112-2.fc16.7 will be installed
--> Processing Dependency: kernel-uname-r = 3.2.7-1.fc16.i686 for package: kmod-wl-3.2.7-1.fc16.i686-5.100.82.112-2.fc16.7.i686
--> Processing Dependency: wl-kmod-common >= 5.100.82.112 for package: kmod-wl-3.2.7-1.fc16.i686-5.100.82.112-2.fc16.7.i686
--> Running transaction check
---> Package broadcom-wl.noarch 0:5.100.82.112-2.fc16 will be installed
---> Package kmod-wl-3.2.7-1.fc16.i686.i686 0:5.100.82.112-2.fc16.7 will be installed
--> Processing Dependency: kernel-uname-r = 3.2.7-1.fc16.i686 for package: kmod-wl-3.2.7-1.fc16.i686-5.100.82.112-2.fc16.7.i686
--> Finished Dependency Resolution
Error: Package: kmod-wl-3.2.7-1.fc16.i686-5.100.82.112-2.fc16.7.i686 (rpmfusion-nonfree-updates)
Requires: kernel-uname-r = 3.2.7-1.fc16.i686
Installed: kernel-3.2.6-3.fc16.i686 (@updates)
kernel-uname-r = 3.2.6-3.fc16.i686
Installed: kernel-3.2.9-2.fc16.i686 (@updates)
kernel-uname-r = 3.2.9-2.fc16.i686
Installed: kernel-3.2.10-3.fc16.i686 (@updates)
kernel-uname-r = 3.2.10-3.fc16.i686
Available: kernel-3.1.0-7.fc16.i686 (fedora)
kernel-uname-r = 3.1.0-7.fc16.i686
Available: kernel-PAE-3.1.0-7.fc16.i686 (fedora)
kernel-uname-r = 3.1.0-7.fc16.i686.PAE
Available: kernel-PAE-3.2.10-3.fc16.i686 (updates)
kernel-uname-r = 3.2.10-3.fc16.i686.PAE
Available: kernel-PAEdebug-3.1.0-7.fc16.i686 (fedora)
kernel-uname-r = 3.1.0-7.fc16.i686.PAEdebug
Available: kernel-PAEdebug-3.2.10-3.fc16.i686 (updates)
kernel-uname-r = 3.2.10-3.fc16.i686.PAEdebug
Available: kernel-debug-3.1.0-7.fc16.i686 (fedora)
kernel-uname-r = 3.1.0-7.fc16.i686.debug
Available: kernel-debug-3.2.10-3.fc16.i686 (updates)
kernel-uname-r = 3.2.10-3.fc16.i686.debug
You could try using --skip-broken to work around the problem
You could try running: rpm -Va --nofiles --nodigest

Oh, by the way, your wireless will be disabled until you fix this. I hope you have another adaptor handy.So, after looking for awhile I found this solution: install akmod. (Thanks fedora project. I’ll quote zcat’s fedora solved which neatly explains what akmods is:

akmods (similar to dkms) is a solution to the problem of some kernel modules depending on specific versions of a kernel. If you want to use a custom kernel, or a test kernel — e.g. from updates-testing or koji — or if there is a very new kernel in the updates repo, then you must either wait for rpmfusion to rebuild binary kmods to match, or you must yumdownload and rpmbuild the source rpm manually. Enter a better way: automatic kmod rebuilding.

The result is: I have internet without my alfa adaptor again.


ASUS Eee PC 1015PED-MU17-BK (Part 2)

Part 2? Yup. I noticed that if you searched for Fedora and 1015PED-MU17 my blog post on the subject was the first thing to come up. I thought it was time to make a post that would provide proper information for those making that search on goodle..

First off, the information in my other blog post is sort of valid. But this post may also help. It covers the physical install of Fedora 14 But that was more about installing stuff then drivers, and getting up and running.

Oh, one note. I dropped the netbook and it still works. It was more of a controlled drop, because I slipped on the ice. The case got a little scratched up (even through the backpack), and the frame popped out in a few places. I was sweating while I popped everything back together and powered it up. I don’t advise you randomly drop your netbook, but its comforting to know that if you do, it has a chance of surviving.

Getting the Operating Systems Working

Brief Note About Windows

You’ll need to download the wireless and bluetooth drivers from the asus website. Keep the bluetooth drivers handy. You’ll need them when you attempt to pair a bluetooth device.

Fedora

That’s why you’re here, right? For dualtriple booting, see the previously linked posts. I ALWAYS advise dual-booting as opposed to having a dedicated linux device because there are situations where you cannot just have a linux only device. Since the 1015PED-MU17 ships with Windows 7, it isn’t that much harder to dual boot the computer and have that extra protection against possible “Windows-Only” environments.

What Works

I’m happy to that the function buttons work “out of the box” so to speak. Bluetooth drivers work out of the box as well, except that the KBluetooth module cannot properly pair bluetooth devices to the computer. This a a KBluetooth issue, and not a Fedora or eeePC issue. Work around here. The “multitouch” feature that asus uses for a scroll bar also works out of the box. The Intel GMA 3150 video card works correctly, with no issues that I am aware of.

What Doesn’t

The wireless. Actually, it does work. But Fedora doesn’t ship with the proper drivers by default. Instructions to fix this are here. You won’t be able to put the wireless card into monitor mode with the broadcom-wl drivers. You might possibly achieve it with the open source wireless drivers, but I haven’t had the guts to try it yet.

Meh

The projected battery life is also not as good when running linux as opposed to windows. I have not timed the actual battery life however. Windows 7 project 10 hours, with both the wireless and the bluetooth radios turned on. Fedora projects a bit over 5 hours. There may be a work around to improve the life, but I haven’t bothered to find out.

Other Thoughts

Good

The 1015PED-MU17 is a decent netbook. ASUS support is 24/7 like they say. The battery removal system is pretty slick, and I like the hardware camara “shut off”. I can carry it in one hand.

Bad

The power cable works okay. I wish the plug for connecting the charger to the computer was heavier duty, which is why I label it as “bad”.

Ugly

My device had to be shipped back for a replacement “keyboard” to fix my power switch. I’ve had it back for about a week know and will keep the blog posted if the switch fails again. Asus should have payed to ship the device after finding out about the faulty keyboard, but I have not been offered any repayment.

In closing

The 1015PED-MU17 is another Asus eeePC offering. It’s perfectly capable of serving as a linux device and a serviceable netbook regardless of what OS you choose to run.


Switched to OpenSuse. Except I’m going back to Fedora

Haha!

So, at the advice of a friend on Twitter, I installed openSuse over Fedora. It’s worked pretty well so far, but.

There’s some things that just aren’t working right in openSuse. And I’m starting to dislike novell products. Couple that with some issues (mumble absolutely hates my mic for some reason, repositories being a mess under openSuse, bluetooth support is complicated to say the least), and Fedora 14 coming out . . . .

I’ve decided to triple boot the netbook until I figure out if I want to stick with opensuse or switch to Fedora. To be honest, I never though I would be one of those triple boot boot nut cases. But here I am triple booting. Mostly because I still want openSuse for a few things (I think). If life turns out to be easier in Fedora, openSuse is going to get the boot.

Here’s my notes on the process of triple booting:

  1. Use GParted to shrink the two existing opensuse partitions and get some space. Size, methods, etc will vary depending on your partition layout. This will take a lot of time. If you put space in the middle or somewhere, you’re probably going to have to do a block-by-block copy. Its slow. I started it, and then went and ate lunch. The process was still running when I came back.
  2. Install Fedora. Use the custom layout tool (again). The partition I ended up using was /dev/sda8
  3. I installed grub to the first sector of /dev/sda8. The reason is that I setup opensuse to chainload into Fedora. This was easier at the time then installing Fedora’s grub to the mbr of the drive and replicating my openSuse entries.
  4. When you reboot, you’ll have to boot to openSuse. Use the bootloader tool in openSuse to add a chainloading entry to /dev/sda8 or wherever you ended up installing Fedora to.
  5. Reboot again. Pick Fedora and chainload to Fedora. Let the bootloader for Fedora run through. You could optionally change the time-out for the Fedora boot loader to 0 once you get into Fedora.
  6. Do the Fedora setup thing. Not to hard
  7. For the broadcom-wl drivers for the Broadcom 4313 in my eee, I needed to add the rpm fusion repositories. Referenced from here, run the following in terminal:
      su -c 'rpm -Uvh http://download1.rpmfusion.org/free/fedora/rpmfusion-free-release-stable.noarch.rpm'
      su -c 'rpm -Uvh http://download1.rpmfusion.org/nonfree/fedora/rpmfusion-nonfree-release-stable.noarch.rpm'

    At the password prompt enter the root password then press Enter.

  8. su -c "yum install broadcom-wl"
    su -c 'modprobe wl'
  9. Configure optional software. My immediate install list is:
      su -c "yum install geany yakuake firefox"

If you want to reinstall grub to the root of the member and let Fedora take over, you can do a google search for “reinstall grub fedora” and find out how.

That’s a crappy update, but one none the less. Hopefully I can do a more personal update. Until then, keep it real.

*Source*
Broadcom setup help: http://fedoramobile.org/fc-wireless/broadcom-linux-sta-driver


ASUS Eee PC 1015PED-MU17-BK (Part 1)

Introduction

Update: Finally made Part 2. Enjoy.

My quest for a laptop supporting linux has come to a close. However, that doesn’t mean that the category “my laptop+linux” is invalid anymore. There’s a whole world that I’ve just now passed through the gate of.

Alright. So my netbook is the ASUS Eee PC 1015PED-MU17-BK, which you can find here. I’m getting tired of Newegg’s crap with shipping, so it is with some reservation that I link to newegg. I also purchased a memorex USB CD drive from Staples.

I’m thinking that his will be a two part blog post. The first is going to be about getting linux onto the netbook. Part 2 will be a hardware review. The one thing I’m going to mention is that I went and bought a external CDDVD drive for this. There seems to be some tricks for booting from a SD cardusb drive that I haven’t found out yet. The CD drive made it so that I didn’t have to worry about that. It made my life a lot easier in a few other things as well, so it seems it was worth the outlay of cash.

Backing Up the Eee In Preparation For the New OS Install

The stock 1015PED comes with Windows 7 Starter. There is no aero, you can’t change change the background, and probably a few other things I didn’t take the time to find the limitations of. Mine shipped with a western digital hard drive, so I backed it up about 3 different ways using this, Acronis True Image WD Edition Software. Its a horrifically locked down version of Acronis that you can get from Western Digital because you’re purchased one of their Hard drives, but it did what I needed. I always advise at least backing up your HD with software. If you can afford it, it’s best to just install a new HD, so you always have the factory version. Acronis is the best imaging software I’ve used, hands down.

Factory Partition Layout

Let’s talk about the default Asus partition layout. The first partition is Windows 7 Starter, about 100 gigs. The second seems to be a backup for Win 7. The third partition is about 117 gigs, and is just empty, which is very nice for us. The fourth partition is named 0xFF (I believe), somewhere labeled “EFI”. After some googling I found that this is what Asus uses to enable rapid booting. This is actually a fairly optimal layout, all things considered though it does present a need for creativity.

Installing The Fresh OS

Installing Windows XP?

Originally, I was going to install Windows XP. I know that its a out-dated OS. However:

  1. It wasn’t going to be a primary operating system. I intended it just as a backup, for when I ran into something that just “had to be done” via Windows.
  2. It was light on resources. With only a gig of RAM, Win 7 will work, but a fresh install ends up reserving about half of the available RAM for its bloat.
  3. Same with the vid card. Win Xp doesn’t have aero. I can turn aero off, but its a nice eye candy feature and is something that I feel the Win 7 interface leans heavily on.
  4. It would do what I needed.

Okay, Maybe Windows 7 Instead

Sadly, the Eee seemed to need a hard disc driver that I couldn’t get the windows XP installer to recognize, because I had the files on a USB drive instead of a floppy disc. I believe I could have pulled off the install, as I have a USB floppy drive. But I didn’t want to fight the installer, so I settled on a fresh Windows 7 Professional install. The bonuses of using Win 7 are:

  1. Drivers are SUPER easy. Win 7 will literally go and find the device driver and install them for you.
  2. Security wise, Win 7 is bounds ahead of Win XP.
  3. End of Life is coming up for Win XP. I would have had to install Win 7 then anyways

The Actual Install

I over wrote the current Win 7 starter install. The had the bonus effect of preventing Win 7 from making its system reserved partition. I then use the Disk Cleanup utility to delete the old 20 gigs of Win 7 Starter install that Win 7 Professional had left on the system. I’m not going back and even if I do, I’m going to use one of those images I made with acronis to go back. The I installed all the updates available from Microsoft.

Other Windows Notes

While in windows, I also checked the layout of the disc, to make sure that I was going to overwrite the correct partitions. I wanted to leave the factory backup and factory EFI partition, mostly because I’m not brave enough to nuke them and find out what happens. I pulled open the start menu, then right clicked on Computer and chose Manage. I then found that the blank drive, G was partition 3. I wrote that down as I needed it for later. Then I made sure that the system clock is correctly set.

Installing Linux!

Then it was time to install my linux. That’s what getting my netbook was all about, wasn’t it? I’m not going to debate which distro. Some prefer debian, specifically Ubuntu. Recently, I’ve had just way to much trouble from Ubuntu, the rant about which I could make it own blog post. I used to prefer Mepis, which is a debian based distro. It has a dedicated developer and a vibrant, if small, community. However, I wanted something with a little bigger base, that wasn’t as “Kiddie” as I felt Mepis is. I moved to Fedora 13, code name Goddard which is the same distro that I use on my desktop. And, yes I went with KDE.

General Notes

I booted off the live CD. After I got it booted, I loaded the fedora installer. The prompts are easy, and somewhat user specific so I’m not going to cover everything. One note: on a purely linux computer, the system clock is set to UTC. This is note the case on something that is windows based. Make sure that you de-check the “System clock set to UTC time” when you’re setting up your time zone.

Partition Configuration

Next partitioning. I had to go with a custom setup because Fedora couldn’t figure what was happening with my hard drive partitions. It wasn’t to hard to setup custom partitions as the Fedora installer is pretty smart. I deleted the Asus pre-made 117 gig partition (#3, I had you write that down, remember?). Then from that space I made the new partitions. These actually ended up being sub-partitions, but they work anyway.

Root Partition

My first partition is the root partition. The dialogue gave me a choice making it a specified size, using all the space, or saving some space off the end of the new partition. I picked the option to save some space off the end then told the Fedora installer I wanted 2075 megbytes reserved. The ended up being /dev/sda5.

Swap Partition

Linux installers will usually complain if you don’t have a swap. As near as I understand it, its kinda like virtual memoryram a place to files if you want to hibernate a computer. You don’t have to, but if it complains there’s probably a good reason why the installer is doing so. That’s why I saved the 2075 megabytes off the the end of my root partition. Usually, your swap should be at least as big as your RAM. I can expand my Eee to have 2 gigs of RAM, which is equal to 2048 megabytes. That’s what I saved that last 2075 megabytes of space on the HD for. A little breathing room is always good. I created a a new partition without a mount point and setup as swap. Then I chose the option to use the remaining space. Easy.

Final Notes

After that I continued with the installer. For the boot options, I renamed “Other” to “Windows 7” because that’s what its detecting, it just isn’t labeling it correctly for me.  I also installed grub to the mbr portion of the hard drive, something I also advise. From there, its pretty dang easy. Run the rest of the installer, then reboot.
Fedora will run you through some prompts, answer those and you’re off.  On thing you may want to do is

su; yum install synaptic

and then you can use apt-get in fedora and well as have the excellent synaptic package manager.

In Conclusion

That’s all I’ve got for now. I know I’ve played perhaps a bit to much with the <h1> and friends in this post. If it really bothers you, leave a complaint. Leave any notes, suggestions, etc in the comments. You can also tell me how stupid my current layout is if you’d like, however be prepared to give proof on why its better. Also, you’re responsible for the warranty on the horked up netbook.
On thing though, don’t use a fake email. I have your IP adress. That means you, strange fellow from University of Chicago in the ITS department who seems to have a real problem with the way I’m handling Geany Portable.


Linux Update!

Well, I never properly ended off my category about my laptop and linux.  As I said somewhere in the previous post, it has to do with the BIOS, or more accurately the lack there of.

I gave up on getting linux onto my laptop and working for a number of reasons.  The biggest one was I didn’t have enough time to get the damn thing done.  The other was  it was to big of a fight with my parents who seem to think that they can consume all of my free time.  The end result of that was it was literally causing my mind to crash and burn.

So, about a week ago I booted up a distro called Back Track 4, just for grins and giggles.  Or because I really want linux.  Guess what?  The Ubuntu (or rather Kubuntu) based distro worked.  I figured what the heck, with a server that runs all the time I’ll download the live disc and have a gander at Kubuntu, and it seems to be working properly.  The fan runs at least, which is something I didn’t have with the other versions.  I”m going to try to get Kubuntu installed within the month.  Maybe I can have my birthday off to do whatever the hell I want (its a Sunday after all).

I don’t normally like Ubuntu.  I personally think it more of a “kiddie” OS, though there are those that would disagree with me.  Perhaps their thoughts on the subject are well founded.  Again, debating linux distros is worse then debating Apple and Redmond.  (I only debate whether the x86 and x86_64 is better then Apple’s platform, which x86 is surely better for a number of reasons). Update: Apple sucks, plain and simple.  I can stand people that can use both windows and macs and make a LOGICAL and fair argument for why they PREFER one or the other.  Debating the flavors of linux is redundant to.  However, at least you are comparing kiwi to kiwi, and not kiwis to oranges to crap (mac).  Now, back to the main content: I also dislike its (Ubuntu’s) overwhelming popularity.  I tend to avoid anything like that.  Popularity really makes me wary of things.  But in this case, it seems to be working in its favor.  People have the shitty insydeh20 bios that Toshiba used for the laptop, and Canonical seems to have listened.  Its great.

But first I think I need to reinstall Windows 7.  Yes, the OS that I installed back somewhere in January.  I seem to be having a driver issue that I think is related to update I received, since the mouse works perfectly within Linux.

Another Update: Since I threatened the OS with a re-install, its been behaving.  A update must have screwed the system up, which is what I figured.

Does that might mean that there’s going to be yet ANOTHER guide on Dual Booting a computer?  Probably, we’ll see how lazy I’m feeling.

Until I next post, goodnight.