Ham Radio Isn’t Cheap
Much like shooting, ham radio is expensive. I think all fun hobbies are. But after spending $820 for the radio, I wasn’t in the mood (or the financial state) to drop another $100 to $150 on an Alinco Power Supply. Slick as spit, but not worth it.
So, here is what I came up with:
My power supply has the following features:
- Hacker cred. I put it together, and it looks nice and works great, on 2M at least.
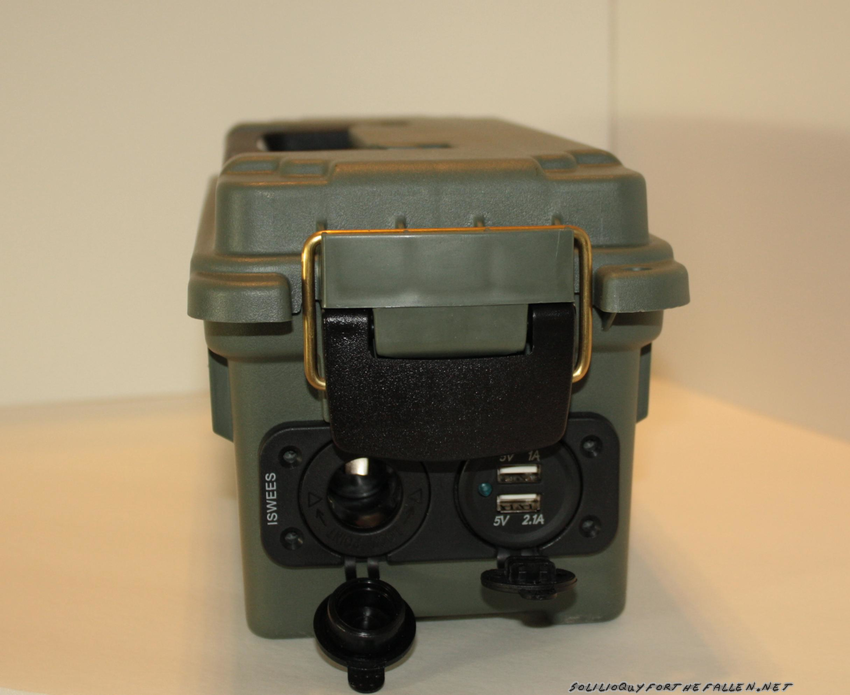
- Dual USB ports, for keeping a phone topped off.
- A cigarette lighter, for powering/charging a baofeng or anything 12V compatible.
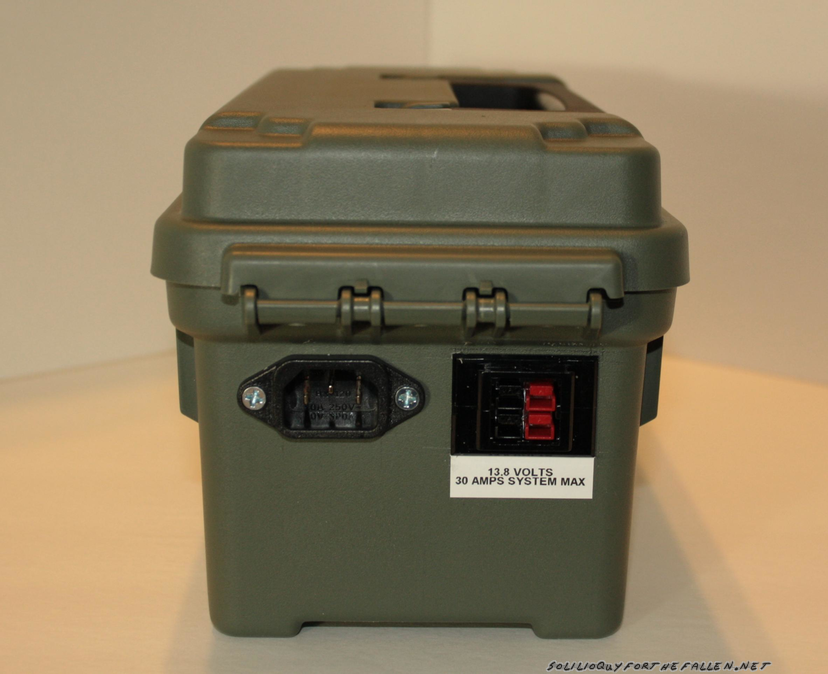
- Dual Anderson Powerpoles on the rear, for the ham’s favorite 12V connector
- Uses a standard computer power supply cable.
So, here is my Bill of Materials:
- Anderson PowerPole Connectors
- Anderson PowerPole Chassis Mount
- PC Power Supply Socket
- USB\Car Charger Socket
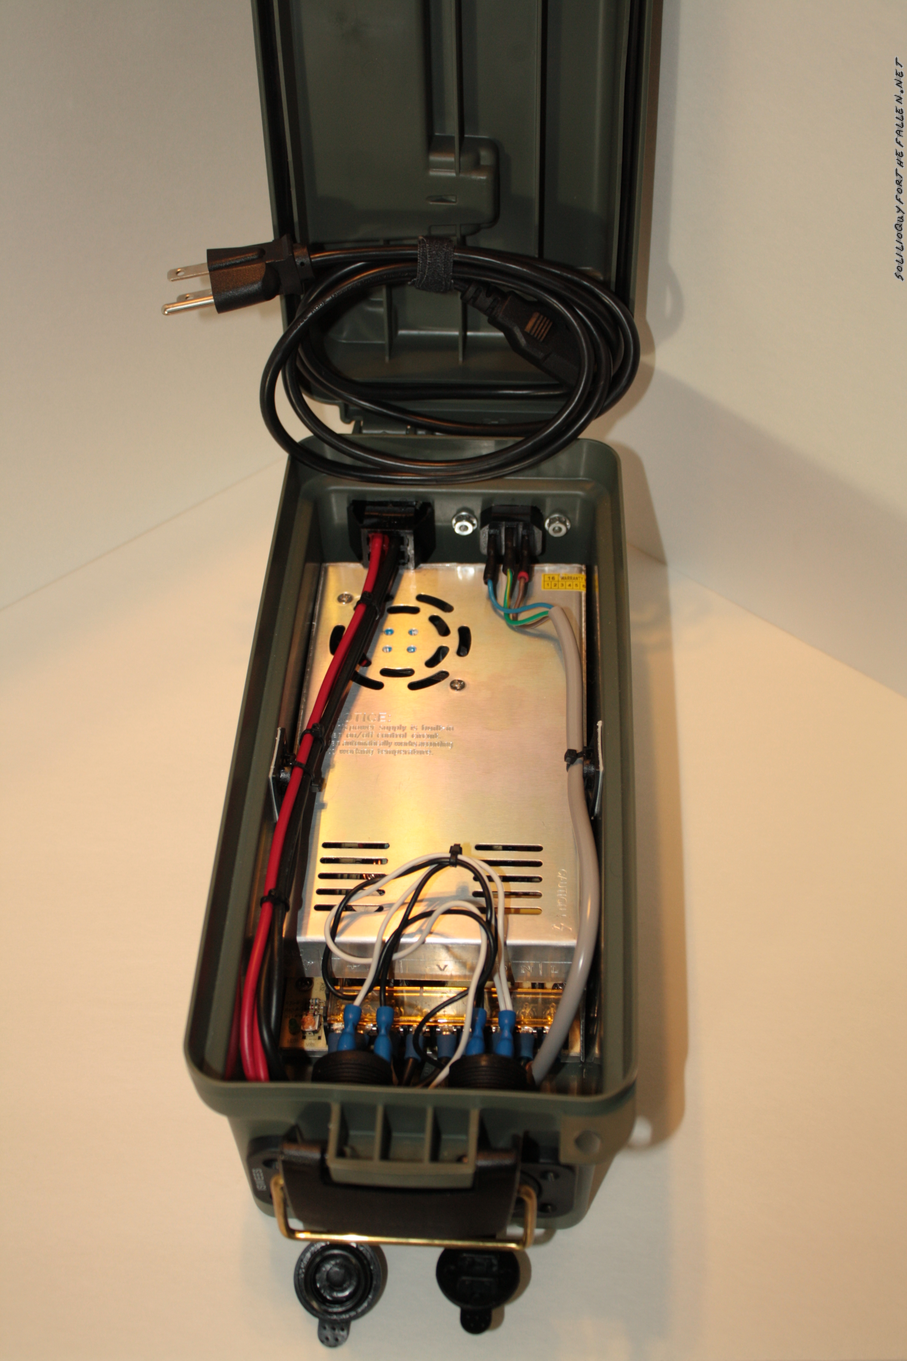
- 12V 30A Regulated PC Powersupply
- Plano 121202 Shotshell Dry Box
A few build notes:
- I crimped the powerpoles using my standard channelock wire strippers and then soldered them with my hakko. This gives about as good as a connected as you can get.
- I used standard spade connectors (though mine are from Menards), again crimped and soldered, to connect everything to the power supply unit.
- Most ham radios expect 13.8VDC, instead of the 12V this one was outputting. That’s okay, there’s a dandy reostat you can use to adjust the output power. I had mine set for 13.81V and its drifted to 13.84/5. I suspect it has to do with the construction and actually powering the unit up. However, my 857 will tolerate a +/- 10% range, so eh. I’ll adjust it again the next time I fire it up.
- Take care when making the AC Mains connections. I am using a cut\trimmed piece of a PC power cord, with crimped and soldered spade terminals connected to the socket and to the power supply unit. I used some push on connecters to make a removable/solid connection to my socket, then put heat shrink over the arrangement to make sure I had removed and electrocution hazard, as best as possible. 14VDC will tickle, 120VAC will kill, and hurt the entire time.
- Cut outs for the Chassis mount and PC powersupply socket were done with an x-acto knife, a ruler, and a little bit of caliper work. Everything fits perfectly. Lay out the holes you need, then visually check the marks are in the right place. Make light passes with the x-acto to cut through the plastic of the dry box.
- This is such a gadgety thing, but it makes doing zip ties so much easier, tighter, and with practice the cut offs cleaner.
The total cost of the arrangement? Not counting the sundries I had on hand, $54.04. Not bad, a third of the cost and quite a bit more fun. You could do this even cheaper if you skipped the power powerpoles and the other features, but charging phones is good. When I first made it, I had the radio and a cut off power cord running directly to the power supply unit. It worked, and worked well, but I wanted to make things cleaner for sure.
Questions? Comments? Leave them below. 73, and good night all.
Edit: I posted this to /r/amatuerradio and generated a fair response. I would like to highlight Megas3300’s RF Choke. This is probably needed for mine as well, but so far I’ve only used this on VHF. A proper HF antenna system awaits.
[…] would add and document in a later post. Initially I though I would pull the server supply out of this box and mount it to finish out the calendar year, then purchase a solution like the Samlex closer to […]
I’m loking for a cheap way out to power and second transceiver. Your Power Supply looks good and cheap. However, I m worried about noise caused by a switching power supply. How bad was it? Thanks, Tony
It worked out alright for the cost. The lower you get into HF the more present the noise will be.