Category: programming

Puking up a Code Sample in Python

I hate python, it’s not friendly to my eyes.  That being said the compiler is super helpful.  And yes, I’m still alive despite the best efforts of …. myself.

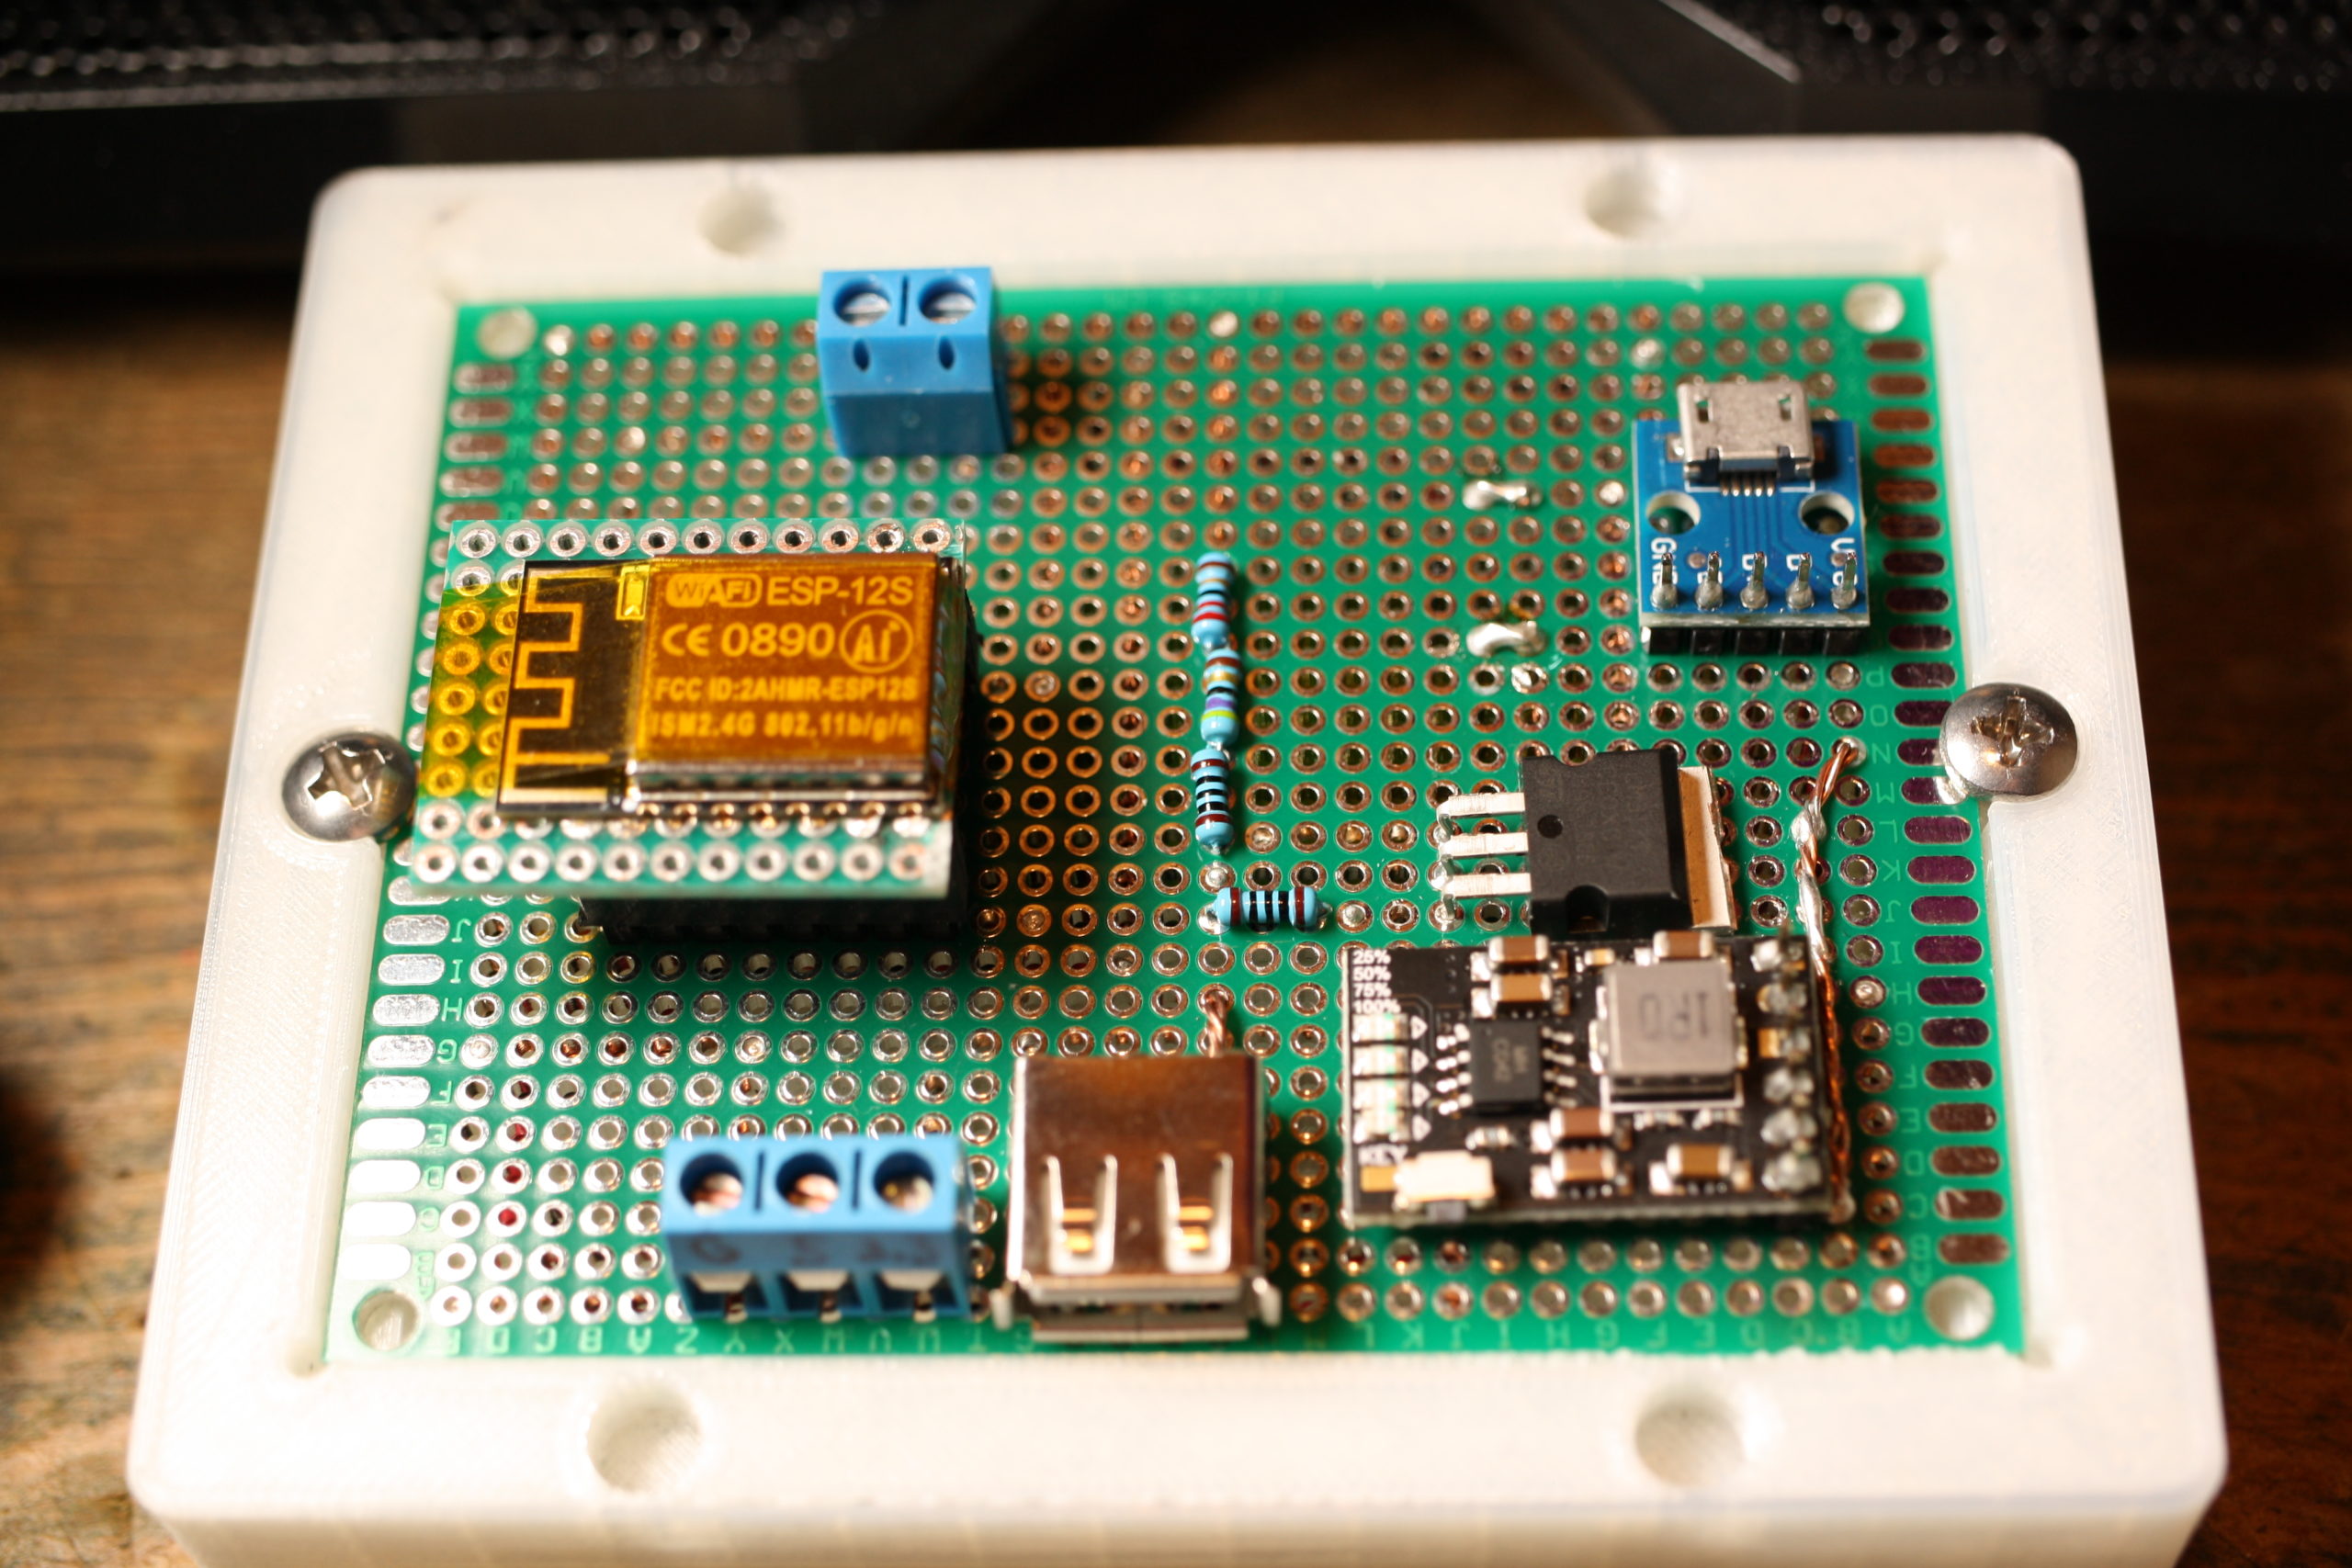
I’m throwing together a raspberry pi zero powered uptime checker and an i2c backpack lcd display. I didn’t want to write my own library, and I wanted this to get thrown together as fast and easily as possible. Thus, I followed this guide using python. Python, ick.

But I’m not posting this to hate on anything. If I post more info on this, then I’ll share my logic for things. Anyway, one of the reasons for this display is an easy was to check the status of my DMR repeater. Here is the basic code I banged together to use the Project Halligan API that Brandmeister provides to check the status of my repeater.

Of note: Brandmeister does not provide an API call that tells you if the repeater is up or down. The website checks the last seen time and if it’s been more then 15 minutes it assumes that repeater is down. Checking against “status” or “status_text” will not tell you if the repeater is up or down merely what timeslots are linked – whether the repeater is connected or not.


import urllib.request, json
from datetime import datetime, timezone, timedelta
from email.utils import formatdate

try:
	url = urllib.request.urlopen("https://api.brandmeister.network/v2/device/313051")
except urllib.error.URLError as e:
	ResponseData = e.reason
	print (ResponseData)
else:
	lastSeen= (json.load(url)['last_seen'])
	print (lastSeen)
	timeOutTime = datetime.now(timezone.utc) - timedelta(minutes=15)
	timeOutString = timeOutTime.strftime("%Y-%m-%d %H:%M:%S")
	print (timeOutString)

	if timeOutString < lastSeen:
		print ("Repeater up")
	else:
		print ("Repeater Down")

This code isn't pretty but it does work, on my machine at least. The post however, is most certainly honest.


A Useful Gadget

The problem though with developing on an arduino is there’s not a real good way to debug it, other then lots of printing to the serial port.  So, not a “problem” – unless you can’t get a computer near what you’re working or you want to air gap your very expensive laptop from the arduino.  How to solve this?

JeeLabs has developed firmware for the esp-12s to turn it into a wifi serial platform.  I think its out of active development at this point, but it still works – and pretty well at this point.  So, I built a breakout to the esp-link.  And feature creep occured.

This isn’t something I really want to sell or build or what have you.  But I decided today while I was debugging the “LazyVac 31” with this that I would share it for everyone, for free.  Because I can – and because I think its that useful.  Since this post is for the developer amongst my readers I won’t deep dive to much.  Instead, I’ll link the relevant components and share the schematics, stl, and some pictures of the finished project.  If you need more details, feel free to ask in the comments.

The Finished Project. Yes, Full Rebel XS + Macro Lense Resolution

Cura View of the Carrier

Top View of the Board

Bottom Side of the Board

Schematic Diagram

Carrier STL

Additional Notes

  • The USB A on board is for power only.  I have a breakout board that plugs into a USB power supply so it makes sense to be able to power the breadboard.
  • From what I can tell, the esp12-s is meant to run on 3.3VDC.  So, since I had to include a 3.3VD rail it makes sense include a screw terminal for 3.3VDC powering.
  • I added the silicone wire and clips after I built the schematic.  I found out that being able to hook up the two wires with the test clips made my life super easy.
  • I generally use my phone to connect to the esp-12s’ wireless access point and then connect to the serial terminal via JuiceSSH.
  • The extra holes on the top of the carrier are meant to have 12mm magnets pressed in for retaining a cover but I’ve never needed the cover enough to design one.

Components

Flashing the Firmware

This is the command I used to flash the firmware via my frog pin programmer.  You’ll need to download the esptool package for your platform to flash the firmware.  Its much easier then tying to get the Arduino IDE to flash the firmware via the programmer.

esptool-2.8/esptool.py --port /dev/ttyUSB0 --baud 460800 write_flash -fs 4m -ff 40m 0x00000 esp-link-v3.0.14-g963ffbb/boot_v1.6.bin 0x1000 esp-link-v3.0.14-g963ffbb/user1.bin 0x7C000 esp-link-v3.0.14-g963ffbb/esp_init_data_default.bin 0x7E000 esp-link-v3.0.14-g963ffbb/blank.bin

esp-link Firmware


An Update. Not too notable.

Hrm, what to update on?  My last post was released roughly 4 months ago.  Who could have imagined where we would be today?  Corona is … mostly a ploy to destroy the economy in the wake of the November elections.  There are some real medical issues that could be present but its to the same group of people who are vulnerable to the seasonal flu.  Its time to get back to work America.

Having addressed that … what else is there to talk about?  Let me rummage about here.  This is more of a scrap bin update so … things might be rough in places.

Projects

The biggest change is that I have a new shop.  I would love to post pictures but operational security and all.  The new shop gives me better capabilities.  I’ve also expanded what tools I have on site.  A basic stick/tig welder, lathe, and work bench are all welcome additions to my capabilities.  I’m looking forward to starting my own business and maybe escaping from the nonsense that is corporate America.  My sales site is already listed on here, but for kicks, check out my offerings at underthebedstudio.com.

I also built a painting cabinet that helps keep the fumes down in the house and give excellent finishes to parts I need to paint.  One of the first projects that I used it for was a drive over antenna base.  My intention to use this at the remaining service events this year that don’t get cancelled as a result of the Panicdemic.

Another cool project I worked on was a Cigar Punch.  With my 3d printer I was able to iterate through designs pretty quickly.  I threw out the iterations but took a picture first:

Only took me 6 tries to get to the form factor I was happy with.  I also finally found a pre-hardened material to make the punch itself from (drill bushings), which was the cause of Mk4 & Mk 4.1.

While I was looking at a few things, I ended up buying an ESP-12s which I found prebuilt firmware that would let me use it as a serial port over wifi.  Pretty sweet.  So here’s my interpretation of it:

Here’s the Schematic for the protoboard above. It uses an 18650 cell under the board for powering everything. And here is the STL for the carrier. I used standard 8-32 screws to hold the protoboard down.  The charger circuit chip is here on Amazon.

Computer Jazz Hands

A few computer things that I’d like to talk about.

First up is the Retroflag GPi.  This is a pretty slick little box that takes a Raspberry Pi Zero (Wireless if that’s your thing) and turns it into a self contained Retropie gaming machine.  Being that its a Pi Zero, it struggles with anything over Super Nintendo but works pretty well for lots of other things.  If you’re into gaming I highly recommend it.  I just wish every single pi unit with the exception of the Pi3 wasn’t so damn finicky.  I do have scripts that allow me to turn off the wifi and the bluetooth and also rsync over wireless.  Code at the bottom.  One thing I would recommend to everyone – just get a bluetooth keyboard at the same time.  Normally I would recommend a 2.4ghz USB keyboard (I’m a fan of this one) but with the Pi Zero and the GPi case – bluetooth is best. I ended up with this one.

Ah, the Hak5 Jasager.  They released the firmware 2.4 for the Mark V a month or so ago.  I hate to say it, but I’ve never really gotten the thing to work as well as I would like.  I’m always fighting with it, and it seems to be always corrupting sd cards – which kills my plugins.  At this point, I would be hard pressed to buy the Mark VI.  Hak5, thanks for all you’ve taught me.  Best of wishes.

What about a Pwnagotchi?  A wifi auth key hacking tomagotchi?  Sweet.  But my dislike of RasPi’s still applies.  Also, its 2020 and now that I ponder the idea – I only see a couple of wifi configurations in the “wild.”  The first is with a proper WPA2 password which can be tricky to catch and crack.  The other is a captive portals with open associations.  And no, fortune 500 employers and authentication portal doesn’t secure the traffic of the users.  With open associations, no reason to associate.  Just grab it from the air.

I built myself a FreeNAS box last year as well.  This makes it super easy to back up my laptop across the network.  A few recommendations

  • Wire your network.  Seriously.  The speeds of a wired 10/100 easily exceed the speeds of wireless.  While you’re at it, this is an excellent time to learn how to make your own network cables.  Pick up a 100′ Cat5e cable and a crimpers + ends and go to town.  Custom length cables make management much easier.
  • Put in a “dumb” gigabit switch between your main computer and the freeNAS.  I bought this one, but I couldn’t tell you if it would better then any other.  Going to gigbit?  Amazing.  Most files get transferred before a status window can open.  And backups – ironically 10 times faster.
  • RAID.  RAID all the things!
  • And, do yourself a favor.  Get a cheap UPS to put the freeNAS on so minor (or major) power outages let it fail gracefully.
  • Having a well spec’d FreeNAS box lets you run servers all the time.  I have one that starts up to handle my DNS requests.  I’m running the Pi-Hole distribution because I’m not a fan of ads.  Or the tracking nonsense that they do.

Getting a FreeNAS box set up was awesome.  I highly recommend it.  Right now, I’m loving everything about it.

I’m still running Fedora 30 on my laptop.  I’ve never really booted to the Windows 10 installation that came with it – just to shrink the partition and I’m considering getting rid of it when I update to Fedora 32.  I’ve held out against Fedora 31 long enough that I think I’m going to wait for 32 now.  I usually do a fresh install.  To many things can get muddled when doing an update and a fresh start it always nice. Probably make an image of the HD again before I wipe Windows 10 though.  Shout out to Clonezilla.  Thanks guys!

Miscellaneous Topics

Affiliate Links.  There’s still no affiliate links here on the blog, and there will probably never, ever be unless the players change their tune.  As I figured, they’ve started to weaponize the Terms of Service and its just not worth it for the little money.  If the Youtube Adpocolypse can hit somebody like Demolition Ranch …. it will happen to anyone.  Free Speech is important – don’t let yourself get caught in the trap.  By the way, COVID-19 is totally Commie China’s fault.

Social Distancing.  Ugh.  Seriously?  Why did it take this for people to realize that door knobs, pin pads, and people are nasty?  They’re just nasty.  And, stay the hell out of my face.  COVID or not, I don’t want you within reach.  Just back off.  If you’re close enough that I could reach out and kick you … maybe you should back up just a touch.

Drones.  I would love to get a TinyWhoop with FPV.  I think it could be super useful and handy.  But then I look at my other drones that I never touch and convince myself its to much.  Drone guys, keep it up.  I’ll have to live vicariously through your youtube videos.

Macro Lens.  Why did I not buy one of these before?  They are super awesome.  I’ve messed with macro tubes, but they don’t work as well as a macro lense does.  I highly recommend buying refurbished lenses and flashes directly from Canon.  They’re a little more (like … $20) then what you would find for used prices, come with a warranty, and free shipping.  I’ve always been super happy with Canon equipment and their repair shop.  Seriously though, is this not gorgeous?  Having a macro lense is great for documenting any of the fiddly things I do, like below.  And honestly, I can see it being “one lense to rule them all” for me.  The kit lens is a close second.

I recently went through an purged my youtube subscriptions.  I think I got rid of half of them – many had been deleted or I no longer watched them.  A few channels to shout out:

  • Andrew Klavan – I love his satirical intros.
  • Marling Baits – He makes fishing baits, and good videos just to have playing.
  • This Old Tony – Dad Jokes and Machining.
  • AVE – irreverant as f*ck.
  • Ivan Miranda – massive scale 3d printing projects.
  • Project Binky – in Colour! Dry british humor, and the only car show I’ve ever liked.
  • Townsends – this man would have killed it on PBS when I was a kid.

The DS213 o-scope.  Not a bad little device.  Short on features, but for the price tag not a bad deal either.  It let me see some things I couldn’t see with my multimeter.  I have a proper oscope I need to repair, but to be honest I’m scared of the high voltage that’s inside.  I found a drybox case online that holds this and the probes perfectly.  Standard USB charging nonsense.

While I’m at it, check on the NanoVNA.  I’ve only really used it for checking SWR but there’s apparently a ton more that it can do.  Here’s my kit, with the adapters I’ll need to get it to work with my equipment.  As big as my go box and antenna setup is, its nice to know I can through this in my messenger bag or goruck with my laptop and be able to make some quick checks.  This does standard usb charging as well but it wants a USB-C cable but doesn’t implement the fast charging spec.  A waste.

Other Life Stuff

Still need to get digital working in my go box.  Hopefully taking the time this week to put my HF rig on a dummy load and do the experimenting that I need to do.

I could really use a vacation.  Somewhere tropical, sunny, and hot would be nice.  Maybe via a cruise ship?  Prices went through the floor now …..

Mentioning drones and how its not really something, I’d really love a Yaesu FT-818.  Oh well, I probably wouldn’t use that either.

In Closing

Rock on folks.  I’m going to peace out for a bit.  Hope you enjoyed the randomness presented above.

RetroPie Scripts

Make a folder in the RetroPie roms directory called “bash” – mkdir -r ~/RetroPie/roms/bash

Copy over bash scripts. I have scripts for enabling and disabling the wifi adaptor, as well as using rsync across my LAN for rom directory syncing

Copy bash-mod/configs/bash into /opt/retropie/configs/

Copy over bash-mod/theme/bash into /etc/emulationstation/themes/carbon (or whatever theme you’re running is)

sudo /etc/emulationstation/es_systems.cfg and add the following code to the <systemlist> tree:

						<system>
							<name>bash</name>
							<fullname>Bash Shell</fullname>
							<path>/home/pi/RetroPie/roms/bash</path>
							<extension>.sh .SH</extension>
							<command>/opt/retropie/supplementary/runcommand/runcommand.sh 0 _SYS_ bash %ROM%</command>
							<platform>bash</platform>
							<theme>bash</theme>
						</system>

Restart Emulation Station

bluetoothdown.sh

#!/bin/bash

sudo rfkill block bluetooth

bluetooth-up.sh

#!/bin/bash

sudo rfkill unblock bluetooth

wifi-down.sh

#!/bin/bash

#sudo ifconfig wlan0 down
sudo rfkill block wifi

wifi-up.sh

#!/bin/bash

#sudo ifconfig wlan0 up
sudo rfkill unblock wifi

Twitter Script Update

Howdy. Twitter changed the search format, which means my php twitter script wasn’t working correctly. I finally took the time to remedy that tonight. Here’s the updated source code:

', $content);
        $content = explode('', $content[1]);
        return html_entity_decode($content[0]);
    }
    $my_tweet = get_latest_tweet('Username');
    if ($my_tweet != NULL)
        {

            echo "$my_tweet";
        }
    else {
        echo "Twitter is having issues again . . . .";
        }

    ?>

You can reference my old blog post if you want to know more how it works. For the copy/paste types: make sure you cange “Username” on line 20 to your twitter ID.


Compiling Wget on Windows

Last night, I managed to compile Wget on windows, with the SSL options. Compiling wget on windows isn’t really that hard. With MingW is works pretty well. What doesn’t work that well is getting SSL to work, because you need to compile OpenSSL, which is a pretty crappy distribution of SSL. And I never seemed to be able to build OpenSSL within MingW because it relies on autotools which doesn’t work on windows.

Brief note for authors of software: If you want a windows port, make it so I use make, or nmake. Which ever compiler you choose, build it so that I can just build the software, not fight it for an hour, then give up. I will hate you, I will hate your software. And I will have nothing nice to say.

Anyway, I reinstalled windows on my computer. Which means in theory I lost everything I had previously installed. I’m taking a C++ class, and I need a local compiler to code on. So after alot of deliberation, I settled on using MSVC. Then for grins, I decided to build wget with it, and try to get SSL working. I managed it. Here’s my notes on the process:
Installation Setup

  • install visual studio 2008 professional. You might be able to use an express version, but courtesy my colleges I have copies of MCVS 2008. So, I’m making use of it.
  • install active perl 5.10. I don’t care for the activestate distro of perl, but this is what the authors list for openssl and its best to stick as close to the readme files as possible.
  • there is a enough nasm included with vs2008, so you don’t need to install anything extra
  • Update VS2008. Use MS Update.

Compile Open SSL. I used version openssl-1.0.0a.tar.gz. Note that you won’t have the assembly libraries with the following commands, but wget a)doesn’t seem to need them, and b) you won’t have any errors this way :).

  • > perl Configure VC-WIN32 no-asm --prefix=c:/openssl
  • > msdo_ms
  • We want to make a static version, so we don’t have to include the DLLs with our wget distro. Of course, this increases file size, but picky picky.

  • > nmake -f msnt.mak
  • > nmake -f msnt.mak test (optional)
  • > nmake -f msnt.mak install

Build Wget:
The authors of wget include a long winded about compiling Wget 1.12. The short version is, the make routines are mangled and unusable withing wget 1.12. A better windows developer then I want to step up and help? Since it doesn’t work on windows, I used the previous version, wget-1.11.4.tar.gz.

Now, if you don’t’ want SSL, you can skip this part. If you do want SSL, then readfollow.

The wget readme says:

For MSVC the current default is to build Wget with SSL support.  For this to work, you will need to have penSSL installed.  First, get OpenSSL (http://www.openssl.org), compile it and install the relevant headers and libraries where your compiler can find them; currently this could mean (presuming default installation directories for MSVC 6.0) copy (from the compiled OpenSSL directory) the whole inc32openssl directory and its contents to “C:Program FilesMicrosoft Visual StudioVC98Includeopenssl”, and from out32dll (in the openSSL directory) the two needed libraries (libeay32.lib and ssleay32.lib) to “C:Program FilesMicrosoft Visual StudioVC98lib”.  These locations aren’t exactly the best but will get you started if you don’t know where to place these headers and libraries, you should find similar paths for later compiler versions. Usually at run-time some OpenSSL libraries (currently ssleay32.dll and libeay32.dll) will need to be available in your environment PATH.

My distilled version is:

  • copy the C:opensslinc32openssl directory to “C:Program FilesMicrosoft Visual StudioVCIncludeopenssl”
  • Copy the contents of C:openssllib to “C:Program FilesMicrosoft Visual StudioVClib”.

Now, change directories to the extracted wget dir and execute the following:

  • >configure.bat --msvc
  • >nmake

You’ll probably get some errors related to makeinfo.exe or other stuff. But if you execute dir src/*.exe you should see a wget.exe listed in the directory. If so, success. If not, sorry. The final test is to execute src/wget - -help and see if you have SSL options.

To be honest, this guide is really a lot of copy/paste from the various readme files included in the distributions of openssl and wget and my smart aleck comments. I’m just listing the way I did it because there’s only really one good guide online, and its sadly outdated.

I’ve uploaded my binary here, for those who just want wget. Really, you only need to build it you don’t trust me. Everything should be statically compiled, with no dependencies. I’ll be testing it in virtual machine later to be sure.


Quick PHP Note

I’ve been busy hacking the code on somebody’s site.  I just wanna mention the fopen command in PHP.  And how you shouldn’t use it.  It’s frightfully frail, and there’s little to no information on how to make it work.  And sometimes webhosts disable it in the php.ini config, so it doesn’t always work.    Use $data = file_get_contents(“some_random_file.file”) instead to put the contents int a variable.  If you need to make an array from it,$ array = explode (“n”, $data);  instead of fget.  Then call $items_in_array= count($array) – 1; to get the total number of items in the array.  Its a little more wordy, but I think has the same number of lines as the while() loop would require.

Just don’t use fopen.  Please.  Its buggy at best, and possible maybe seemingly unusable in wordpress.  Which is why I had to convert my code from using fopen to file_get_contents.

One more note.  A function’s “present working directory” in wordpress is the directory it’s installed to.  echo getcwd(); as proof 🙂  Which, if I say so myself and I will is stupid.  Total stupid.


The importance of Coding Small

What does “Coding Small” mean?

Simple. It means code small. A small bit of code is easier to debug then a large program.

Take for instance my current Perl coding project. I’m writing a script that will reside on my server and download a comic, and news headlines and then print it out at about 5 in the morning so everybody can have a bit of happiness, and find out what hell has broken loose in the world today.

The comic I want to use is Sheldon. Sometimes, however the creator doesn’t keep strictly to posting the link on his RSS feed. So, I have to make sure that I grab that, or I will get a perl error later on. How you ask?

Until tonight, this comic meant absoloutely nothing to me . . . .

Stand Back!

Yes indeed.

use warnings; use strict;
my @file_contents;

open FILE, "text.txt" or die "$!"; #open with write rights
@file_contents = <FILE>;
close FILE;
foreach my $text (@file_contents){
 chomp $text;
 if ($text =~ m/^Strip for /){
 print $text;
 } else {
 print "No goodness here (Text:$text) n"
 }
}

Pretty much what this snippet does is takes and loads the contents of the file into an array, with each line being an item in the array.  It then stores one value of the array, chomps the newline character off of the end, and check if it starts with “Strip for”, case sensitively via a regular expression.  If the value starts as wanted, then I’m good and it prints that line from the file.  If  the line does not start with “Strip for”, then it prints “No Goodness here” and what the line actually was.

This can then be turned into a subroutine to use with perl.

use warnings; use strict;
my @file_contents;

open FILE, "text.txt" or die "$!"; #open with write rights
@file_contents = <FILE>;
close FILE;

&reg_ex(@file_contents);

sub reg_ex{
 foreach my $text (@file_contents){
 chomp $text;
 if ($text =~ m/^Strip for /){
 print $text;
 } else {
 print "No goodness here (Text:$text) n"
 }
 }
}

Now, no matter how many different types of data I wanna shove at the array, I just call &reg_ex(array of data), and it parse and prints.

Why is this nice?  Let say that I have a more complicated program.  Now that I know that section of code works, I can paste that subroutine in, call when needed, and know that it works and is not affecting other parts of my program.  Then I can work on debugging the rest of my crappy code.

Lemme know what you think in the comments, and hopefully I’ll be posting more of this stuff as I go on . . . .


Email Updates on Server IP Change

Here’s a script I wrote in perl (yes perl) that checks your ip and will email you if the ip changes. Because I’m using private IP’s, I need to check via an external server. What I want to know is if my IP changes, because if it does, I probably need to restart my IRC Bot. Because of the private IP mess, I need to use an external to get my external IP. I use a simple PHP script on my server from Fivebean to tell me the IP.
The PHP is:

<?php
echo $_SERVER['REMOTE_ADDR'];
?>

Stick that somewhere that’s not on your local LAN.
Now, make a batch file with this
perl ip_checker.pl location_of_previous_php_script file_to_write_some_info_to

Coincidentally, I think it would be best if I maybe removed those option and just put them in the configuration section of the perl script . . .

Copy this and save this within the same place as that bat file, using the name ip_checker.pl. Make sure you have Net::SMTP::SSL installed in your perl modules.

use LWP::Simple;
use Net::SMTP::SSL;

use warnings; use strict;
sub text;

#texting information
#configure whether to send alerts.  Email based
################################
######Script configuration######
################################
################################
#####Options Confiugration######
################################
my $send_alert = 'true'; #set true to allow messages to be sent informing you of changes to the local IP
################################
#####Email send information#####
################################

my $email_from = '';
my $email_password = '';
my $send_to= '';
my $email_host ='smtp.gmail.com'; #something link that anyway

################################
##End of Configuration Section##
################################

if (@ARGV ne 2){
    die 'Usage: perl ipchecker.pl (URL To Retrieve External IP From) (File to ReadWrite LastCurrent IP From)n';
}

my $ip_bouncer = shift;
my $read_file_location = shift;
my $current_ip = get($ip_bouncer); die "Couldn't get it!" unless $current_ip;
my $old_ip; my $new_ip;

my $read_file; my $print_file;

open OLD_IP, "$read_file_location" or die "$!"; #open with write rights
$old_ip = <OLD_IP>;
close OLD_IP;
open OLD_IP, ">$read_file_location" or die "$!"; #open with write rights

print "Current IP Address: $current_ip n";
print "Last IP Address: $old_ip n";
print OLD_IP $current_ip;
close OLD_IP;

if ($current_ip ne $old_ip){  #ne is a string comparison of equal or not == is numeric comparison
    #/&text ($host, $from, $password, $message );
    print "Alert!  IP address has changedn";
    if ($send_alert eq 'true'){
    print "Sending Alert!n";
    my $desired_message = "IP Change $current_ip";
    &text ( $send_to, $email_host, $email_from, $email_password, $desired_message);
    print "Alert Sentn";
    }
} else {
    print "All is welln";
    }

sub text { # ($to, $host, $from, $password, $message )
    #mostly from http://robertmaldon.blogspot.com/2006/10/sending-email-through-google-smtp-from.html
    #modified to suit my needs

    my $to = shift;
    my $host = shift;
    my $from = shift;
    my $password = shift;
    my $message = shift;

    my $smtp;
    if (not $smtp = Net::SMTP::SSL->new($host,
                    Port=> 465,
                    Debug => 1,
                  ) ) { die "Couldn't connect" };
    $smtp->auth($from, $password) || die "Authentication failed!n";

    $smtp->mail($from."n" );     # use the sender's address here
    $smtp->to($to."n" );        # recipient's address
    $smtp->data();                      # Start the mail

    # Send the header.
    $smtp->datasend("To: $to n" );
    $smtp->datasend("From: $from n" );
    $smtp->datasend("Subject: Server Alertn");
    $smtp->datasend('Content-Type: text/plain; charset=ISO-8859-1;' . "nn");
    # Send the body.
    $smtp->datasend("Automated Server Message n", $message, "n");
    $smtp->dataend();                   # Finish sending the mail
    $smtp->quit;                        # Close the SMTP connection
}

Schedule every 6 hours or so. I did it with the scheduled jobs thingy in windows server 2003.

Sorry for the poor write up, hit me up in the comments if you need help setting this up or if you have other general questions. Right now, I have to go mess with a wordpress theme in need of fixin . . . .

use warnings; use strict;
sub text;

#texting information
#configure whether to send alerts.  Email based
################################
######Script configuration######
################################
################################
#####Options Confiugration######
################################
my $send_alert = ‘true’; #set true to allow messages to be sent informing you of changes to the local IP
################################
#####Email send information#####
################################

my $email_from = ”;
my $email_password = ”;
my $send_to= ”;
my $email_host =’smtp.gmail.com’; #something link that anyway

################################
##End of Configuration Section##
################################

if (@ARGV ne 2){
die ‘Usage: perl ipchecker.pl (URL To Retrieve External IP From) (File to ReadWrite LastCurrent IP From)n’;
}

my $ip_bouncer = shift;
my $read_file_location = shift;
my $current_ip = get($ip_bouncer); die “Couldn’t get it!” unless $current_ip;
my $old_ip; my $new_ip;

my $read_file; my $print_file;

open OLD_IP, “$read_file_location” or die “$!”; #open with write rights
$old_ip = <OLD_IP>;
close OLD_IP;
open OLD_IP, “>$read_file_location” or die “$!”; #open with write rights

print “Current IP Address: $current_ip n”;
print “Last IP Address: $old_ip n”;
print OLD_IP $current_ip;
close OLD_IP;

if ($current_ip ne $old_ip){  #ne is a string comparison of equal or not == is numeric comparison
#/&text ($host, $from, $password, $message );
print “Alert!  IP address has changedn”;
if ($send_alert eq ‘true’){
print “Sending Alert!n”;
my $desired_message = “IP Change $current_ip”;
&text ( $send_to, $email_host, $email_from, $email_password, $desired_message);
print “Alert Sentn”;
}
} else {
print “All is welln”;
}

sub text { # ($to, $host, $from, $password, $message )
#mostly from http://robertmaldon.blogspot.com/2006/10/sending-email-through-google-smtp-from.html
#modified to suit my needs

my $to = shift;
my $host = shift;
my $from = shift;
my $password = shift;
my $message = shift;

my $smtp;
if (not $smtp = Net::SMTP::SSL->new($host,
Port=> 465,
Debug => 1,
) ) { die “Couldn’t connect” };
$smtp->auth($from, $password) || die “Authentication failed!n”;

$smtp->mail($from.”n” );     # use the sender’s address here
$smtp->to($to.”n” );        # recipient’s address
$smtp->data();                      # Start the mail

# Send the header.
$smtp->datasend(“To: $to n” );
$smtp->datasend(“From: $from n” );
$smtp->datasend(“Subject: Server Alertn”);
$smtp->datasend(‘Content-Type: text/plain; charset=ISO-8859-1;’ . “nn”);
# Send the body.
$smtp->datasend(“Automated Server Message n”, $message, “n”);
$smtp->dataend();                   # Finish sending the mail
$smtp->quit;                        # Close the SMTP connection


Twitter Feed on HomePage Code

On my homepage, you may notice that I have a bit of code to get my latest tweet for this website’s twitter account. Usually this is blog updates, but it may show other things.

I originally found this code on http://www.phoenixheart.net/2009/05/code-snippet-1-get-latest-tweet/. Since twitter has been having issues lately, I realized a need for a fall back value if the code couldn’t get anything. I also removed a variable declaration and then copied the returned value from the function to another variable, to hopefully optimize the code and make it work better and faster.

<?php

 // the function
 /**
 * @desc Get latest tweet from a Twitter account
 * @param string The account's username
 * @return string The tweet
 * http://www.phoenixheart.net/2009/05/code-snippet-1-get-latest-tweet/
 *
 */
 function get_latest_tweet($username) {
 $url = "http://search.twitter.com/search.atom?q=from:$username&rpp=1";
 $content = file_get_contents($url);
 $content = explode('<content type="html">', $content);
 $content = explode('</content>', $content[1]);
 return html_entity_decode($content[0]);
 }
 $my_tweet = get_latest_tweet('TWITTERLOGIN');
 if ($my_tweet == NULL)
 {
echo "Twitter is having issues again . . . .";
 }
 else {
 echo "$my_tweet";
 }

 ?>

Just paste this in a php file and change your twitter name so it gets the right feeds!


SSH Window Forwarding

Recently, I put out a call on freecycle for an old computer (I’d like a laptop to, as well, but . . .) and I got one Sunday. Why did I do this?

SSH Window Forwarding finally got the better of me. What is window forwarding? Well, its a simple enough concept, if you know what you are doing. The concept is that you enable X11 Forwarding and then whenever you open an application with an window interface, like Xterm or Geany, it is opened on your local computer.

This means that if have a remote server with X11 Forwarding and you open Firefox on the commandline, you will be browsing with firefox window forwarded from that computer! You can set this up, then check it out be visting perhaps ipchicken. It will show the ip of the remote computer.

Enough concept, let’s get our fingers dirty!

The first thing you need is a computer. You could also use a Virtual Machine in VBox to do this, but I don’t really have any computers powerful enough to run virtual machines. That was why I requested a old computer. Boy, was it old. Its a HP XE743. Designed for Windows 98. Computer stats: 600 mhz Intel Celeron, and 64 megs of RAM. I was really, really lucky and had a extra stick of RAM that fit the computer (no reason). Now I have 128 megs of RAM.

I mention this for two reasons: 1)to show the power of linux. This is a computer that should be in the graveyard by window’s standards, and yet it is alive and very well by running a slightly outdated copy of Ubuntu Server. 2) Windows forwarding doesn’t take that much power. Running it over my local LAN, my experiences are that even with the low power, it still acts pretty snappily.

The second thing is Linux. I’m sure that there are ways to do this with windows, but linux works. Its also free. My choice was Ubuntu Server 8.10. Yes, I need to update but this was the disc I had handy. I wasn’t expecting to have to do a whole lot with it, though that might change.

Install Ubuntu Server on the machine. Something you really need to be aware of with this machine is that you need to change a few settings in the BIOS. First of all, turn off the quick boot and such. Make it do the full tests to insure everything is correct. Then set the disk access to other, so it knows its using linux. Otherwise, it will act like a turd and not boot at all. Install everything, and when it asks for services, install the sshd. If you forget it, you can install it later. I would recommend using a static ip for all servers. It can be a pain when your server’s ip address changes constantly and you have to find it in the DHCP loan list.

Now, you need to install Xorg. I remember install Xorg, then installing a window manager. It should be sufficient to run something like sudo apt-get install fluxbox. That should pull all dependencies, including xorg for fluxbox. Fluxbox isn’t the best, but it gets the job done, which is what I am concerned about. It also isn’t a resource hog. On this machine, there isn’t a whole lot to hog!

You’ll need to configure Xorg. Run xorg -configure, then copy the config file to the proper location: sudo mv /etc/X11/xorg.conf /etc/X11/xorg.conf.old
cp /home/user/xorg.conf.new /etc/X11/xorg.conf

Edit the sshd conf file to allow window forwarding, and the ssh to try to do window forwarding. These should be in /etc/ssh/sshd_config and /etc/ssh/ssh_config respectively. Run startx and again, then pull up xterm and do ssh localhost. This will ssh to yourself. Run Xterm on the commandline, and you should have a new xterm window popup. You may need to install Xterm first, however. Close out the ssh windows.

Now, head over to your windows machine (cause this is where it gets really cool). Install Xming and start it up. Then start putty. I’m also starting to use Kitty now, which is a port of putty with more features, with some really nice features that make me like it more then putty.

For putty, enter the ip address of the server (I chose 192.168.1.5, and yes that’s a local ip). Go to Connection, then SSH, then X11. Check the box to enable forwarding. Then click connect. Enter login and password. Then, type xterm. If you’ve done everything right on the windows side, Xterm will run and you will have a graphical shell.

*UPDATE*

I installed Ubuntu 10.4, which seems to be a bit friendlier on the resources side of things.  Anyway, I didn’t install or configure xorg.  I simply did <code>sudo apt-get install xterm</code>.  After running Xming on my windows machine and connection, everything ran fine.  So, you’ll need the dependencies (one of which I believe was X11 common) but you don’t have to setup Xorg if you don’t want to.